Seems like today wasn't my day—I had a bit of a lazy start, and some stuff happened in the evening that kind of threw off my mental state. So I wasn't much in the mood for level editing, and I mostly just fiddled with details, because of course I'm fascinated with details.
But I should summarize the level I'm working on here before I get into anything else anyway. Here we go!
Nightfall started out with a simple goal: create a city level with a strong focus on local lighting. Many levels in Distance rely on blanket ambient or directional lighting to make objects visible, but that limits the level of visual detail the author can tune. This is especially noticeable when an inexperienced creator tries their hand at a dark level, often sacrificing visibility for some notion of "atmosphere". The aim of Nightfall is to demonstrate how to rely on local lighting to create an effective nighttime level.

Of course, I'm still pretty new to level design myself, so I'm figuring things out as I go along. I'm sure the resident lighting nerds in the Distance community (looking at you, Brent and Galen) have much more to say on this than I do. I intend to do some thorough testing along the way, though I will probably want the track layout in a "first playable" state before that happens, or else I won't have anything to test. (Besides the light density. I do worry about running into a ceiling with that.)
Naturally, I let the scope increase just a bit along the way, so as I planned the initial stretch of open road leading to the city, I added another component to the design goals: speed zones. Denoted by speed limit signs on the track, these zones break up the level into large sections, altering the drag multiplier for each. They will allow me to experiment with the track gameplay; for instance, a low-speed section in the heart of the city could have many lanes and intersections to navigate, offering corner-cutting action not normally found in Distance. Plus, what good is a futuristic city without an actively-enforced speed limit?
Admittedly, I've only done provisional testing of these zones, and I'm just as likely to throw them out if I find they don't work (it's never too late for that!). The idea actually came about when I sped up the car for the initial stretch, since it felt too slow for an area where I'm primarily trying to catch the attention of the player with the lighting (more on that section of the level in a future post). Hopefully my little experiment is, at the very least, conclusive.

This project also serves as a design exercise for myself, giving me experience in outlining and planning the elements of the level. Further on, playtesting will factor into this as well. It's good practice for when I return to DigiPen and have to apply these skills to games directly once again.
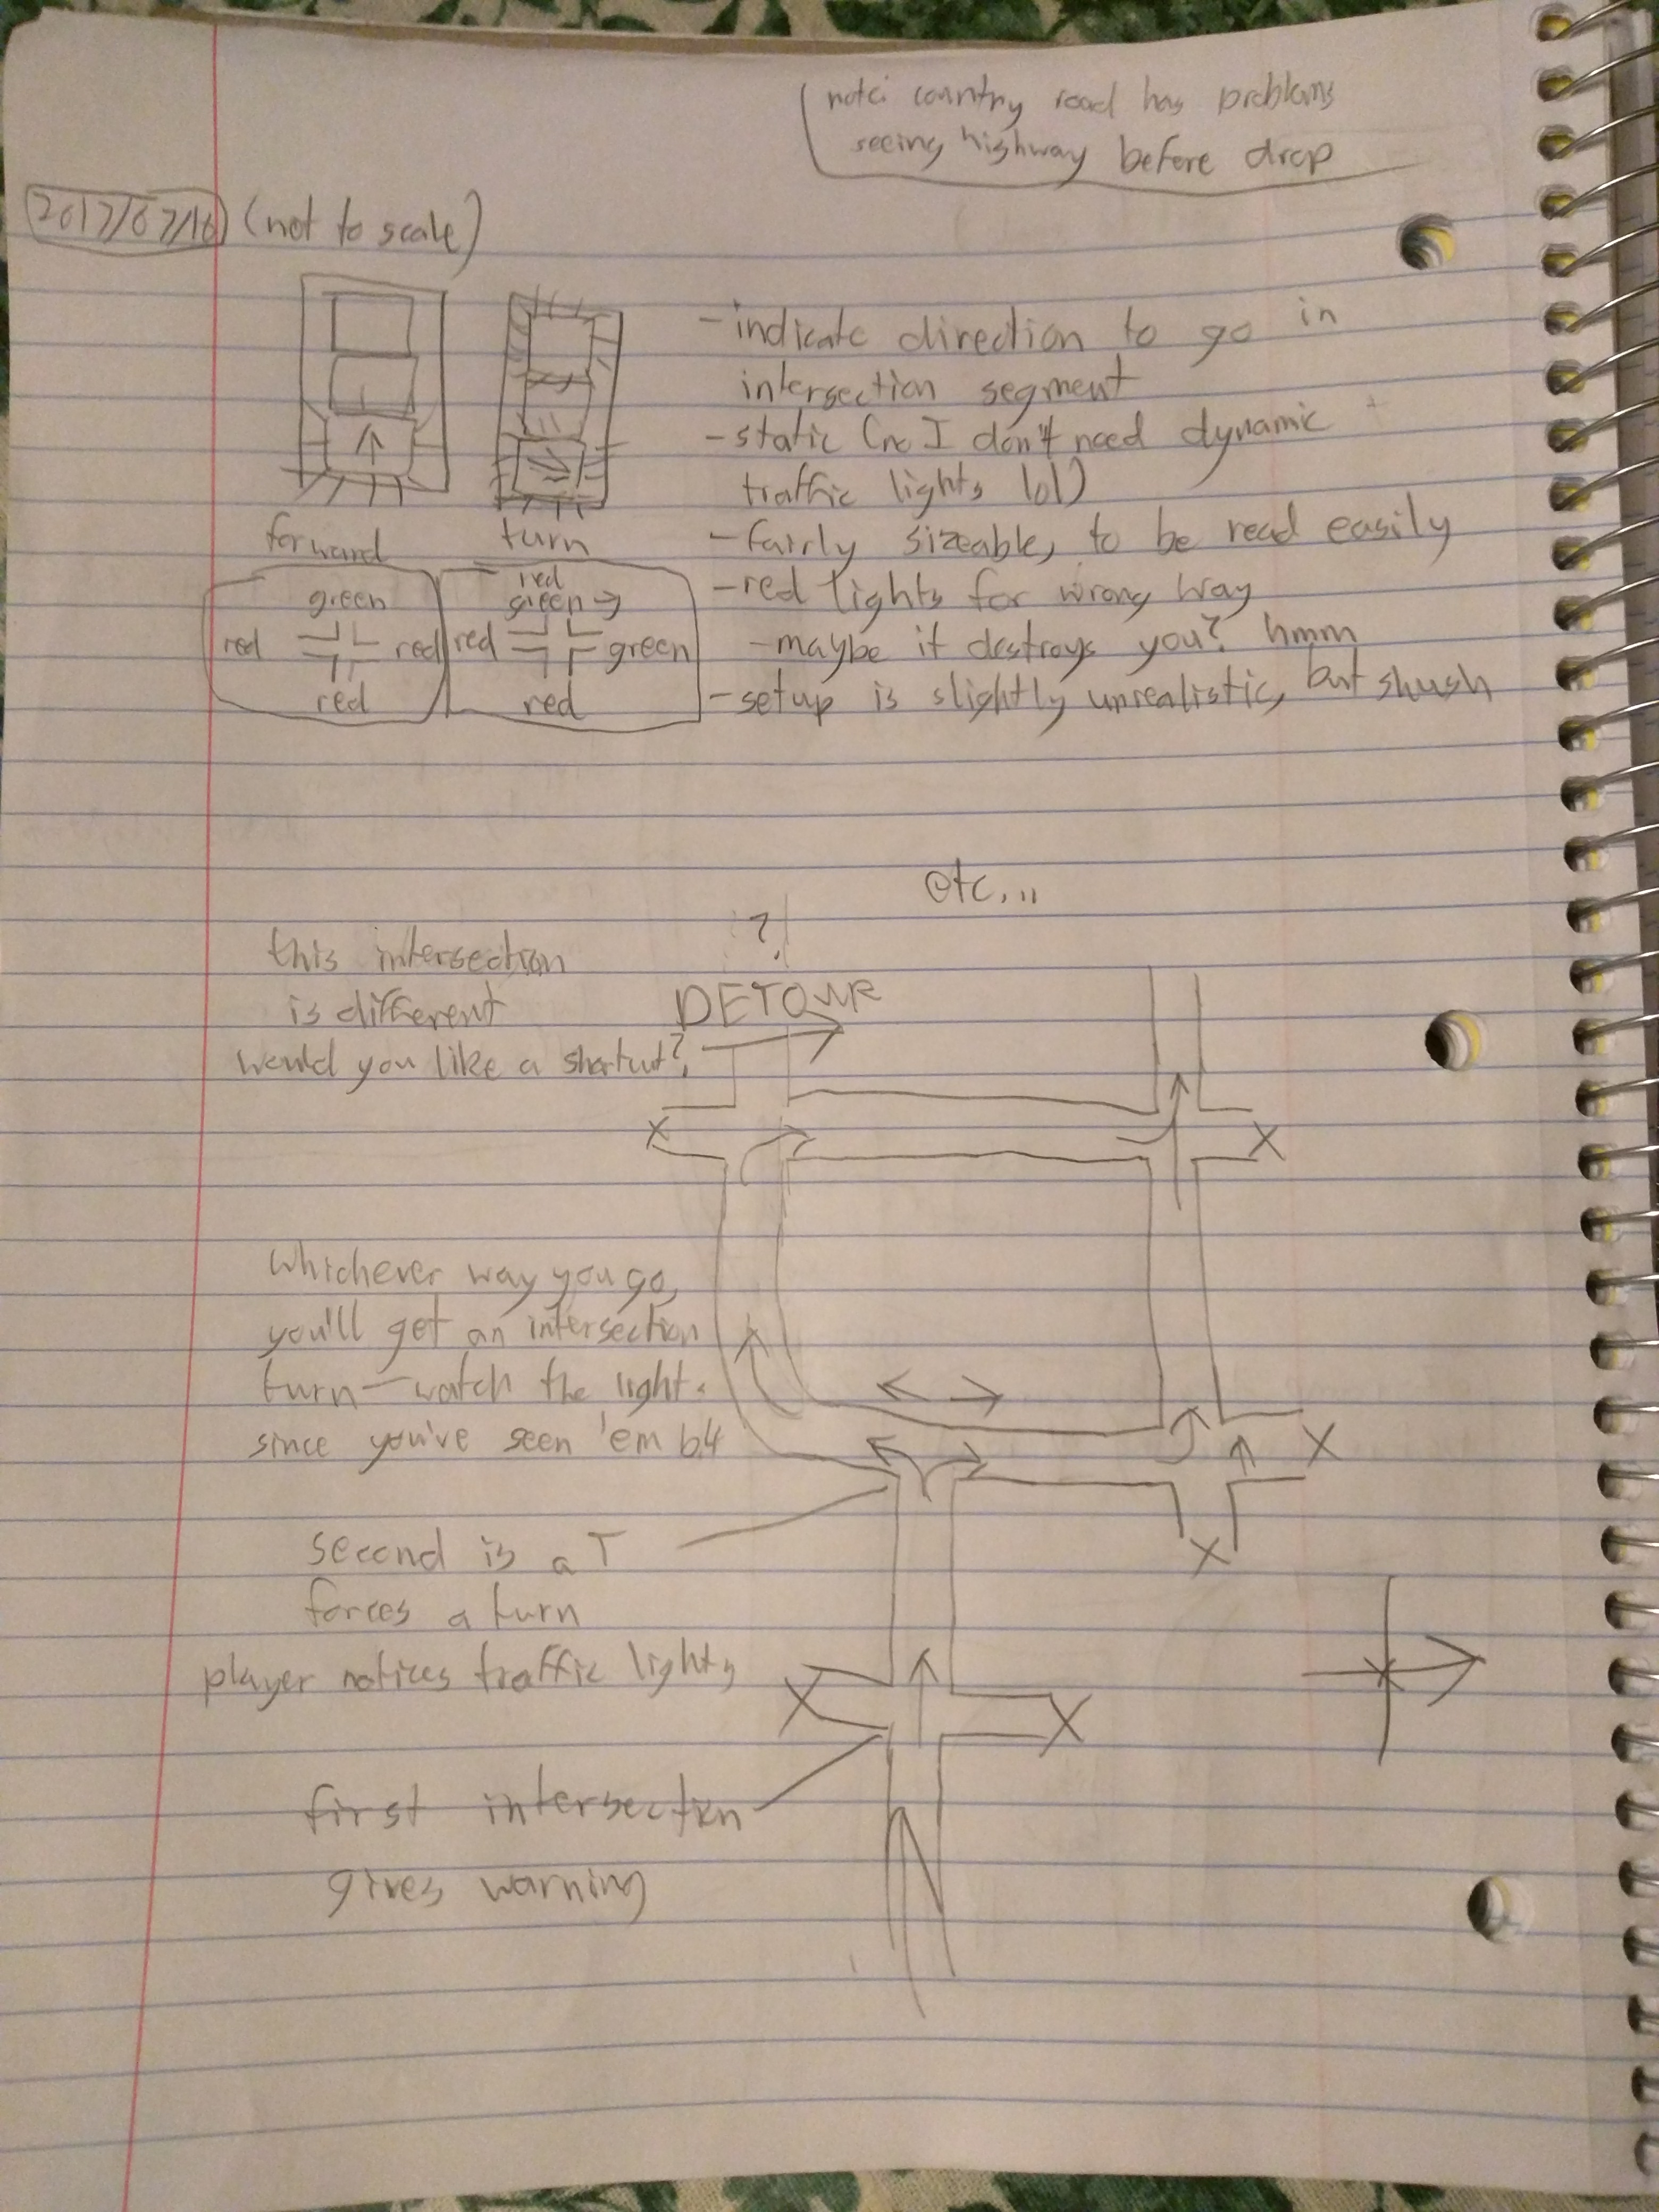
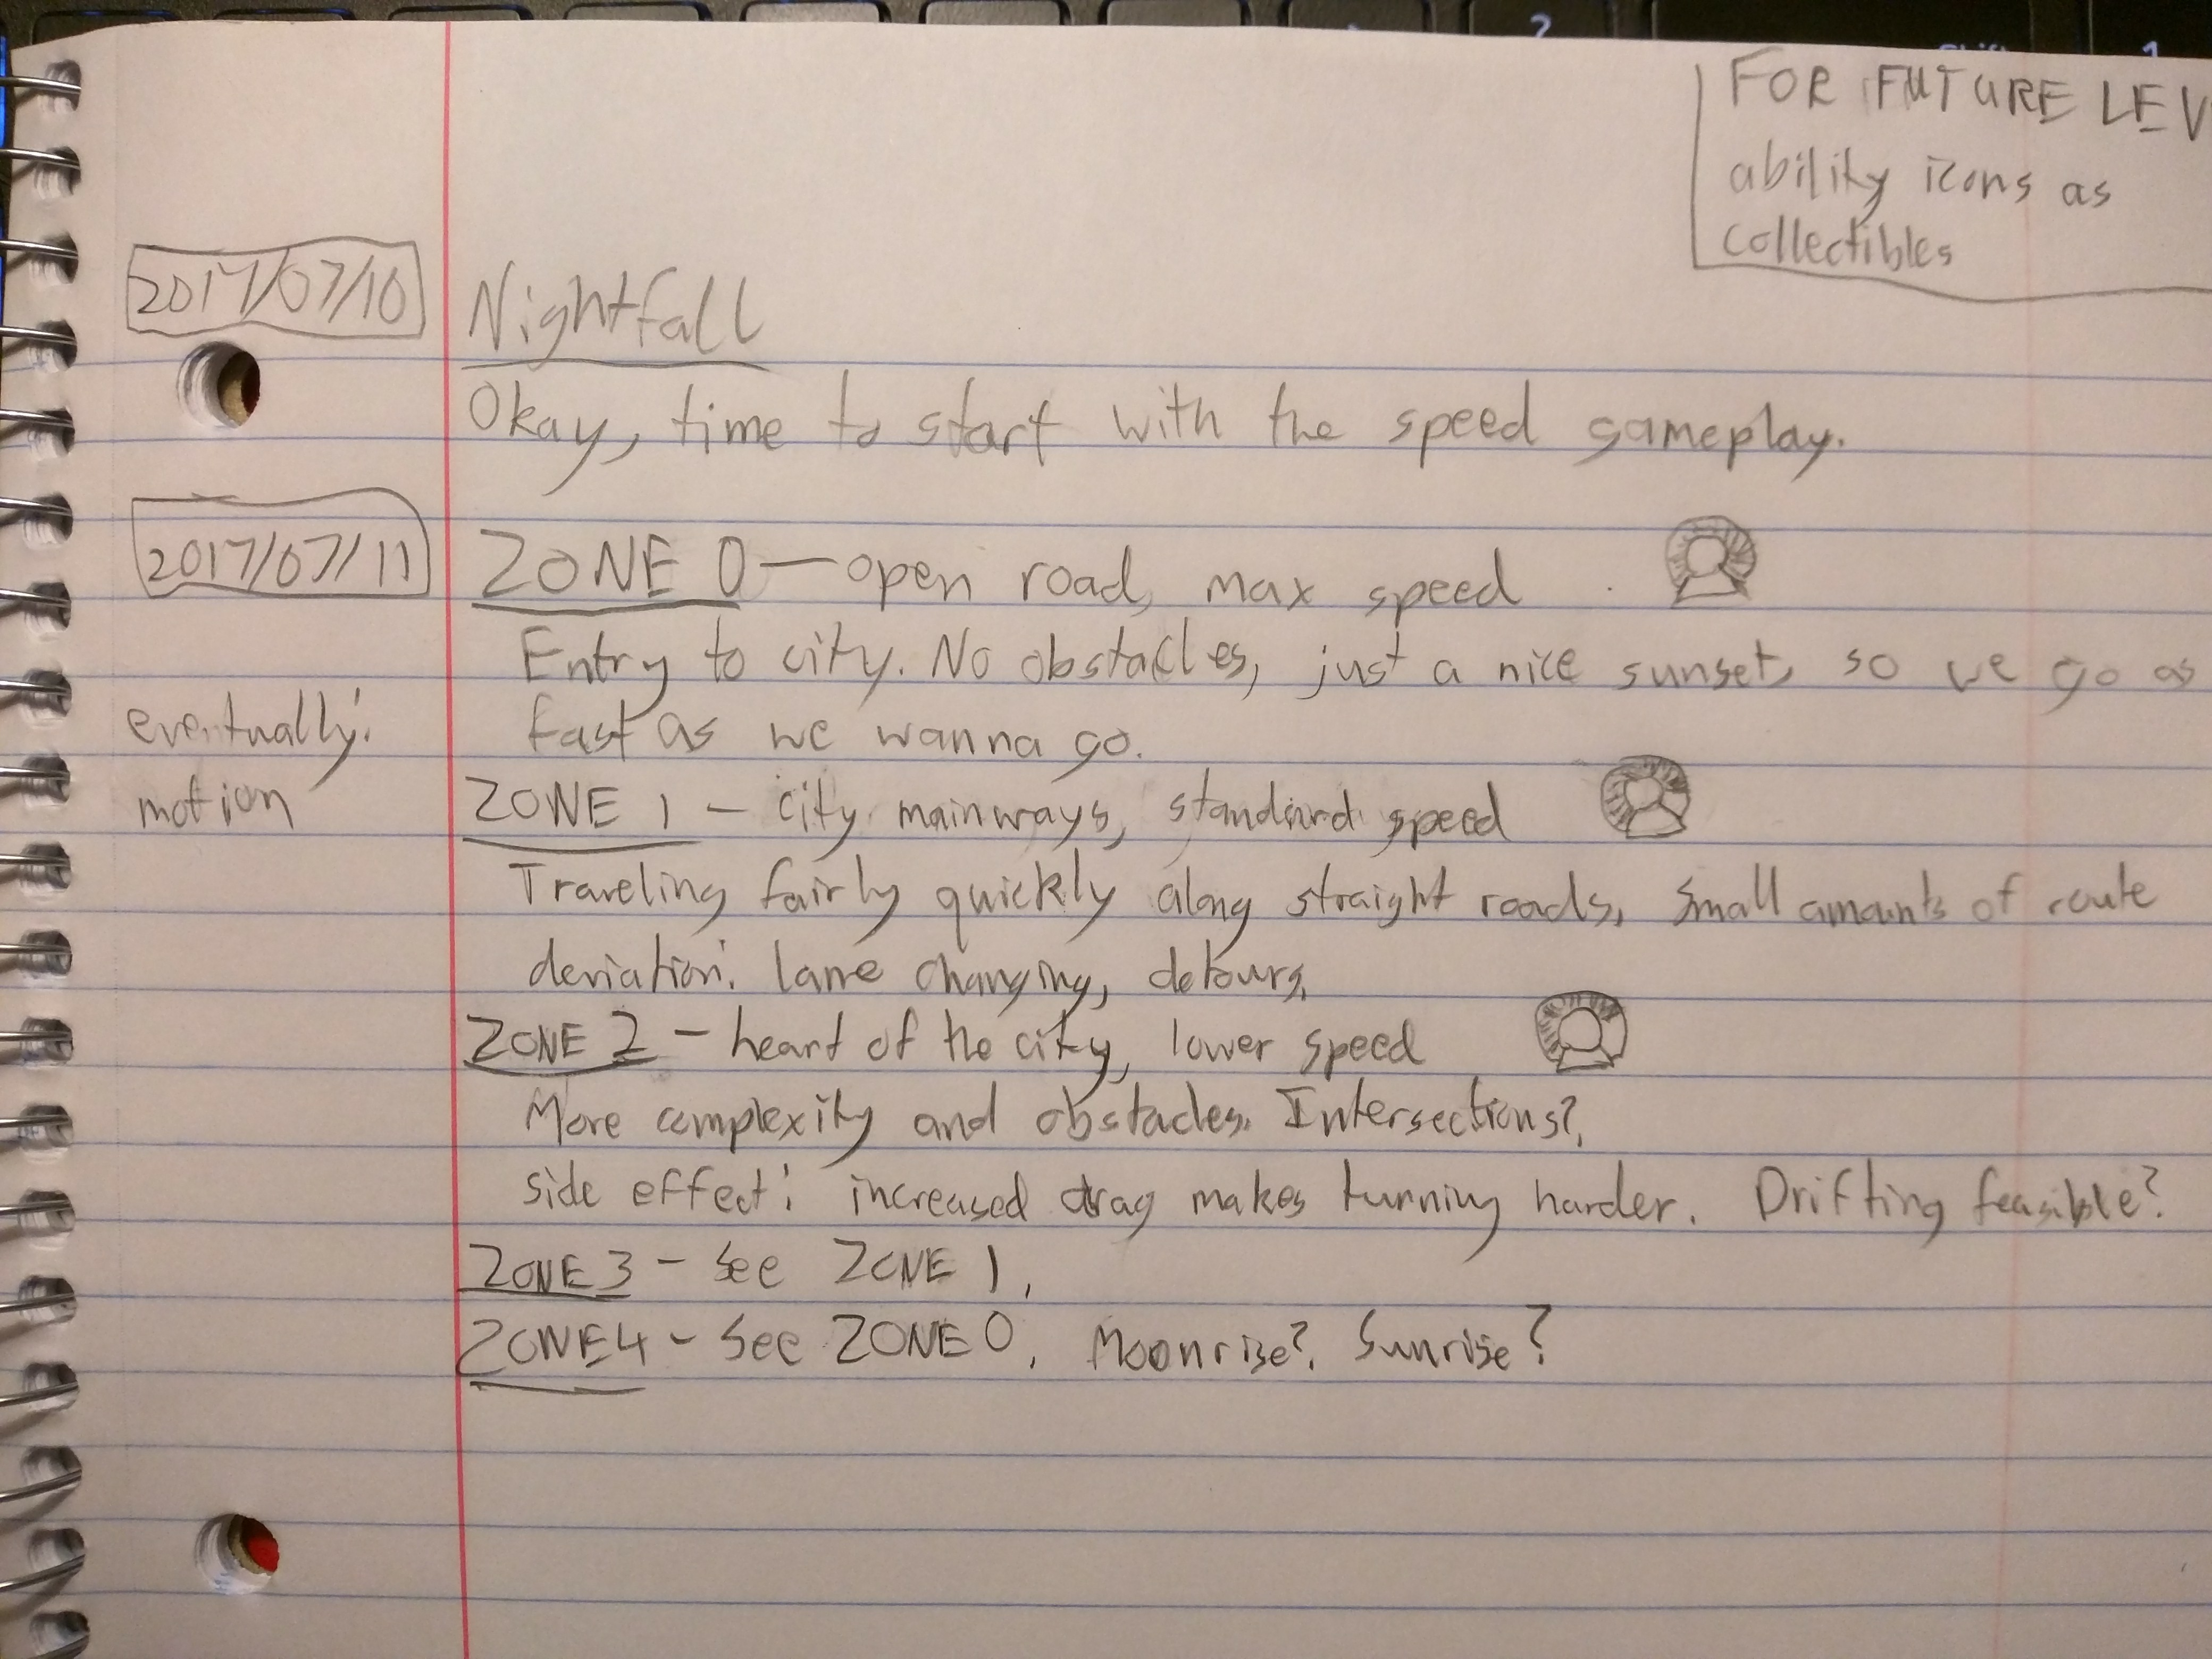
I've started a section in my notebook for sketching ideas, layouts, and goals. I try to make broad strokes while doing this—as I mentioned initially, I easily become obsessed with details, but it's important in the beginning that I just establish my concept, in writing and then in the editor. I can detail later, after prototyping and even testing. (The picture below is from when I first started.)

I've been typing for over an hour and don't want to make a habit of submitting to this thing late, so I'm going to cut myself off here. I'll try to keep my posts concise, likely featuring one or two themes covering the elements of level design I grappled with that day. I'm excited to keep this train rolling, and I hope you're just as excited to follow me! See you tomorrow~
Hello all! Firstly, I'm happy to report that I worked on Nightfall during the afternoon today, as opposed to just at night!! I'm pretty sure I haven't done that at all these past two weeks? Regardless, I'm glad I did! It means I'm really making progress on my work ethic, and I'm spending more time on the level without getting burned out. Unfortunately, it also means I have to think a little harder than usual to remember what I was spending time on. I'm still not recording my Pomodoros either, so maybe in the future I can tie that in and jot down what I spend each Pomodoro on as I do them!
Today's focus ended up being buildings. I know I said I wanted to focus on track layout, but the buildings here are the shell: they define the boundaries of the player's vision from the track, and as such are very important to how the track feels. I can't know what the "key frames" of the track are if I don't know the surrounding scenery; otherwise, I'm just adjusting track nodes arbitrarily.
If you recall from one of my first notebook pages, I noted a number of key points regarding building placement that I gathered from observing other levels. I've mulled it over a bit more while placing buildings today, and I took some research trips to other levels, Hexopolis and Contraband Delivery specifically. Here's some expanded building advice:
With this in mind, my approach with buildings at this early stage is to focus on location, not aesthetics (or at least not to the point where I'm spending lots of time detailing). In effect, I'm painting broad strokes with the buildings; or maybe "outlining" would be a better art term to borrow? Whatever it is, I'm sketching the general backdrop before I fill in the details, as far as the track perspective is concerned.
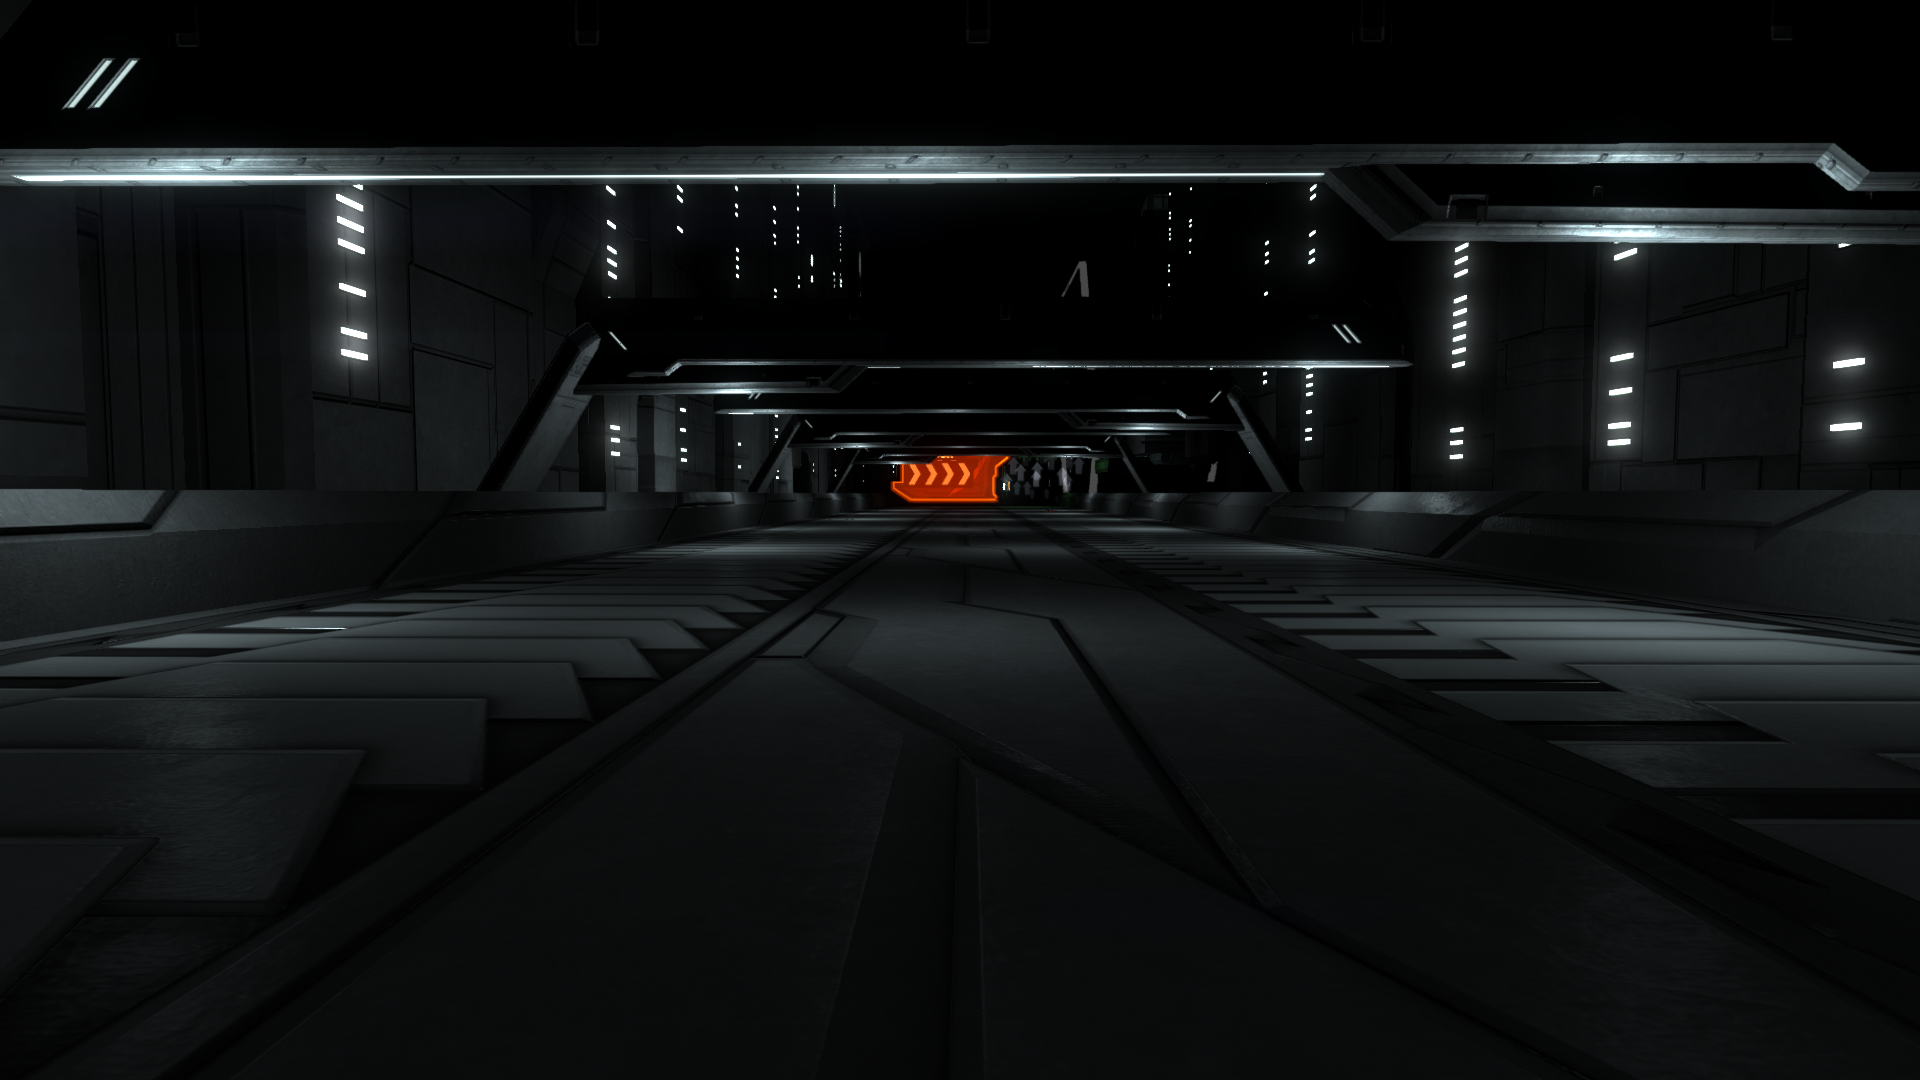
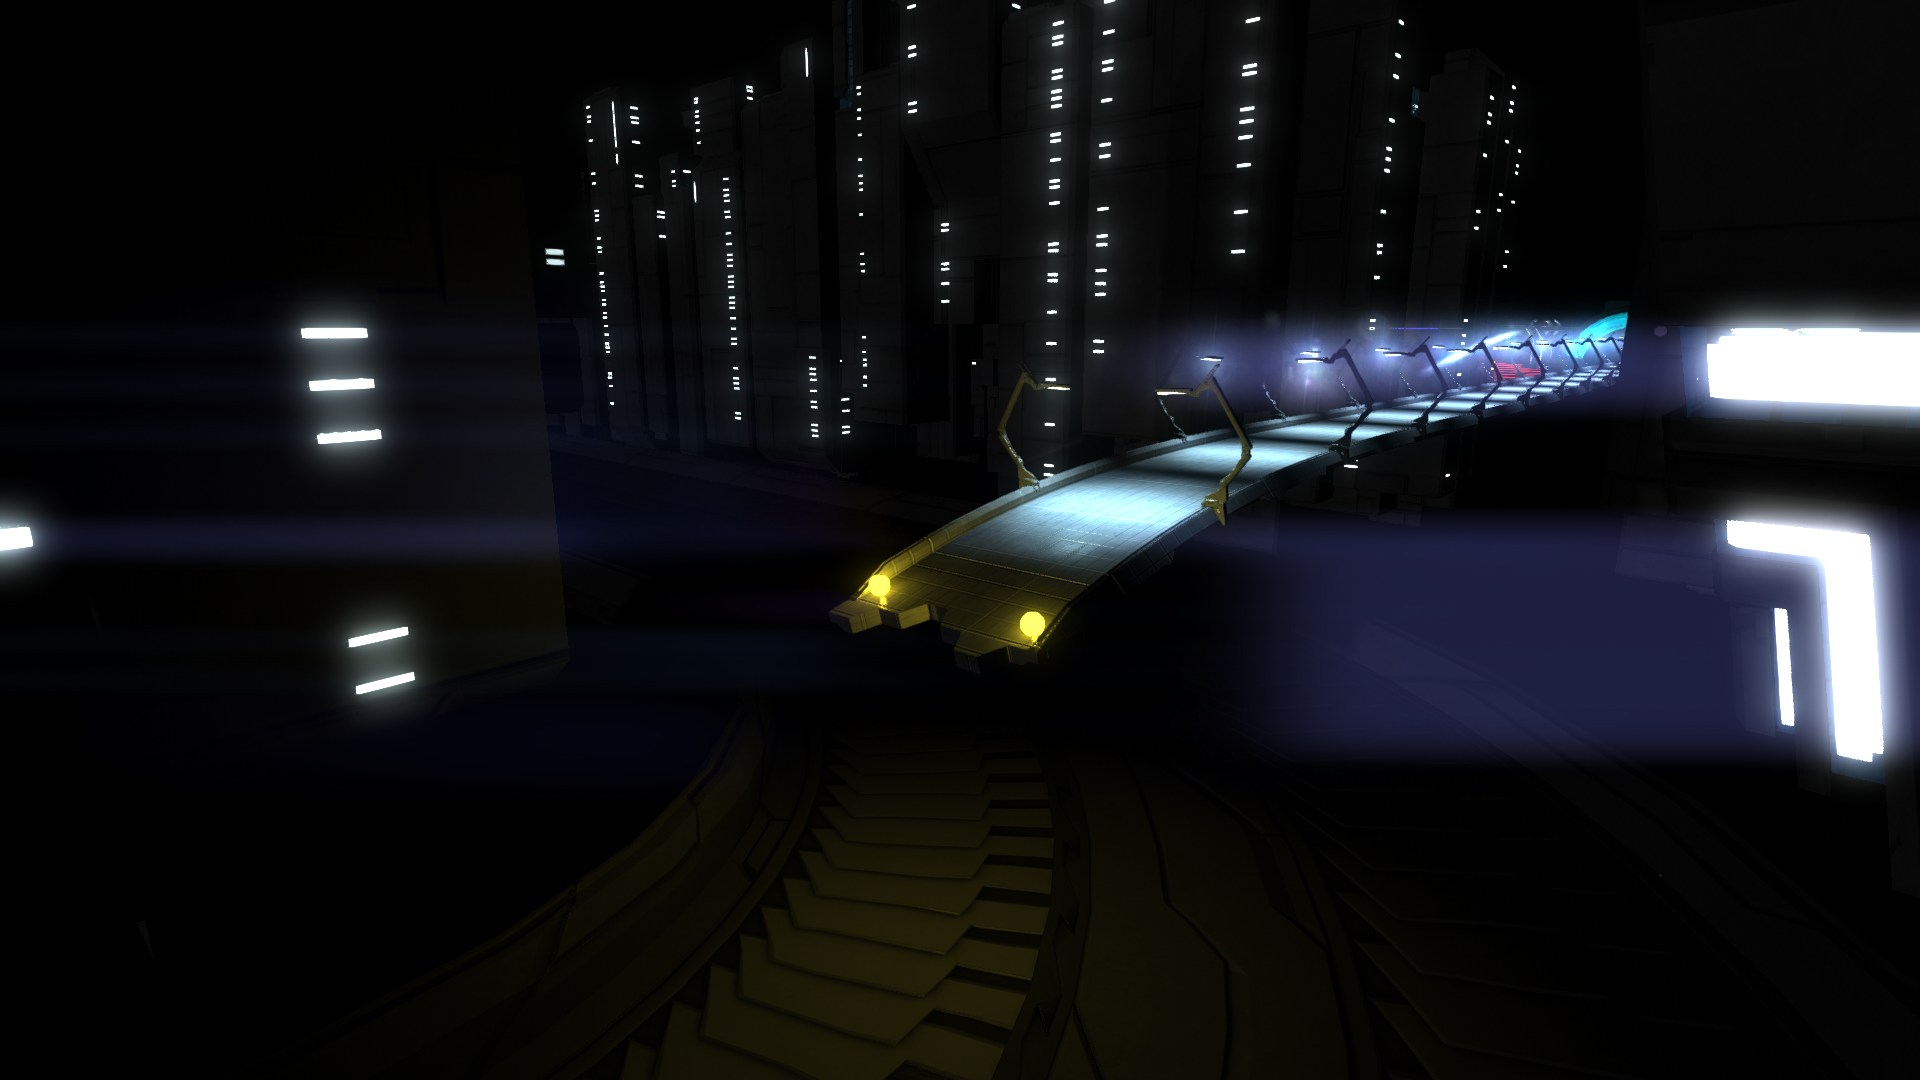
Since I really want to hammer home the feeling that you're in a large city, I jam-pack the sidelines with buildings as soon as you enter. The initial "country road" is around (what I think is) an average height relative to the buildings, maybe 1/4 to 1/3 of the way up them. It's a little tight, but not unreasonable, and you still have a bit of breathing room. Then, you drop down to the highway, which is pretty much ground level when it comes to the buildings. They're a bit tighter now, but the wideness of the highway offsets that a bit; yet, the increased relative height of the buildings signals a greater scale. The arch lamps take care of distracting you from the more open sky. This far in, the city is "locking you in", in a sense.
The section I'm going to work on next becomes more open, where I want to draw attention to a larger scene, mostly below the track. I'm not sure exactly how I'll do that yet, but we'll find out!
I did some more busy work relating to biodomes and light performance today, but there's not much worth mentioning there. I'll certainly need to do a huge optimization pass before I can call this level done, but premature optimization is tedious and distracting, much like my penchant for detailing too early.
And with that, I've finished my first 11 days of regular Distance level editing! (I do have some time tomorrow, but I'll be preparing for my trip.) It was certainly a journey through various aspects of level design, as well as my own work ethic, but it was definitely worth it and I'm glad to have made it through! I've learned a ton from this experience, and hopefully I'll be back here soon once I get a bit more free time! I might even try to continue on during school by making this a weekly update instead.
Phew, I've been typing for at least 45 minutes and I really wanna catch a break and actually play a video game before I need to sleep. Thanks for following this far, and I'll be seeing you again soon~ ^_^
Hey y'all I'm back! I'm gonna make this one real quick because I have 10 minutes and I really wanna push myself to be on time. Today was once again a day where I didn't get started until pretty late, and even then I got distracted and fixated on details when I wasn't. Nevertheless, I am not one to call a day wasted for any reason, and I continued to make just a bit of progress! (Progress on my work ethic as well as the level~)
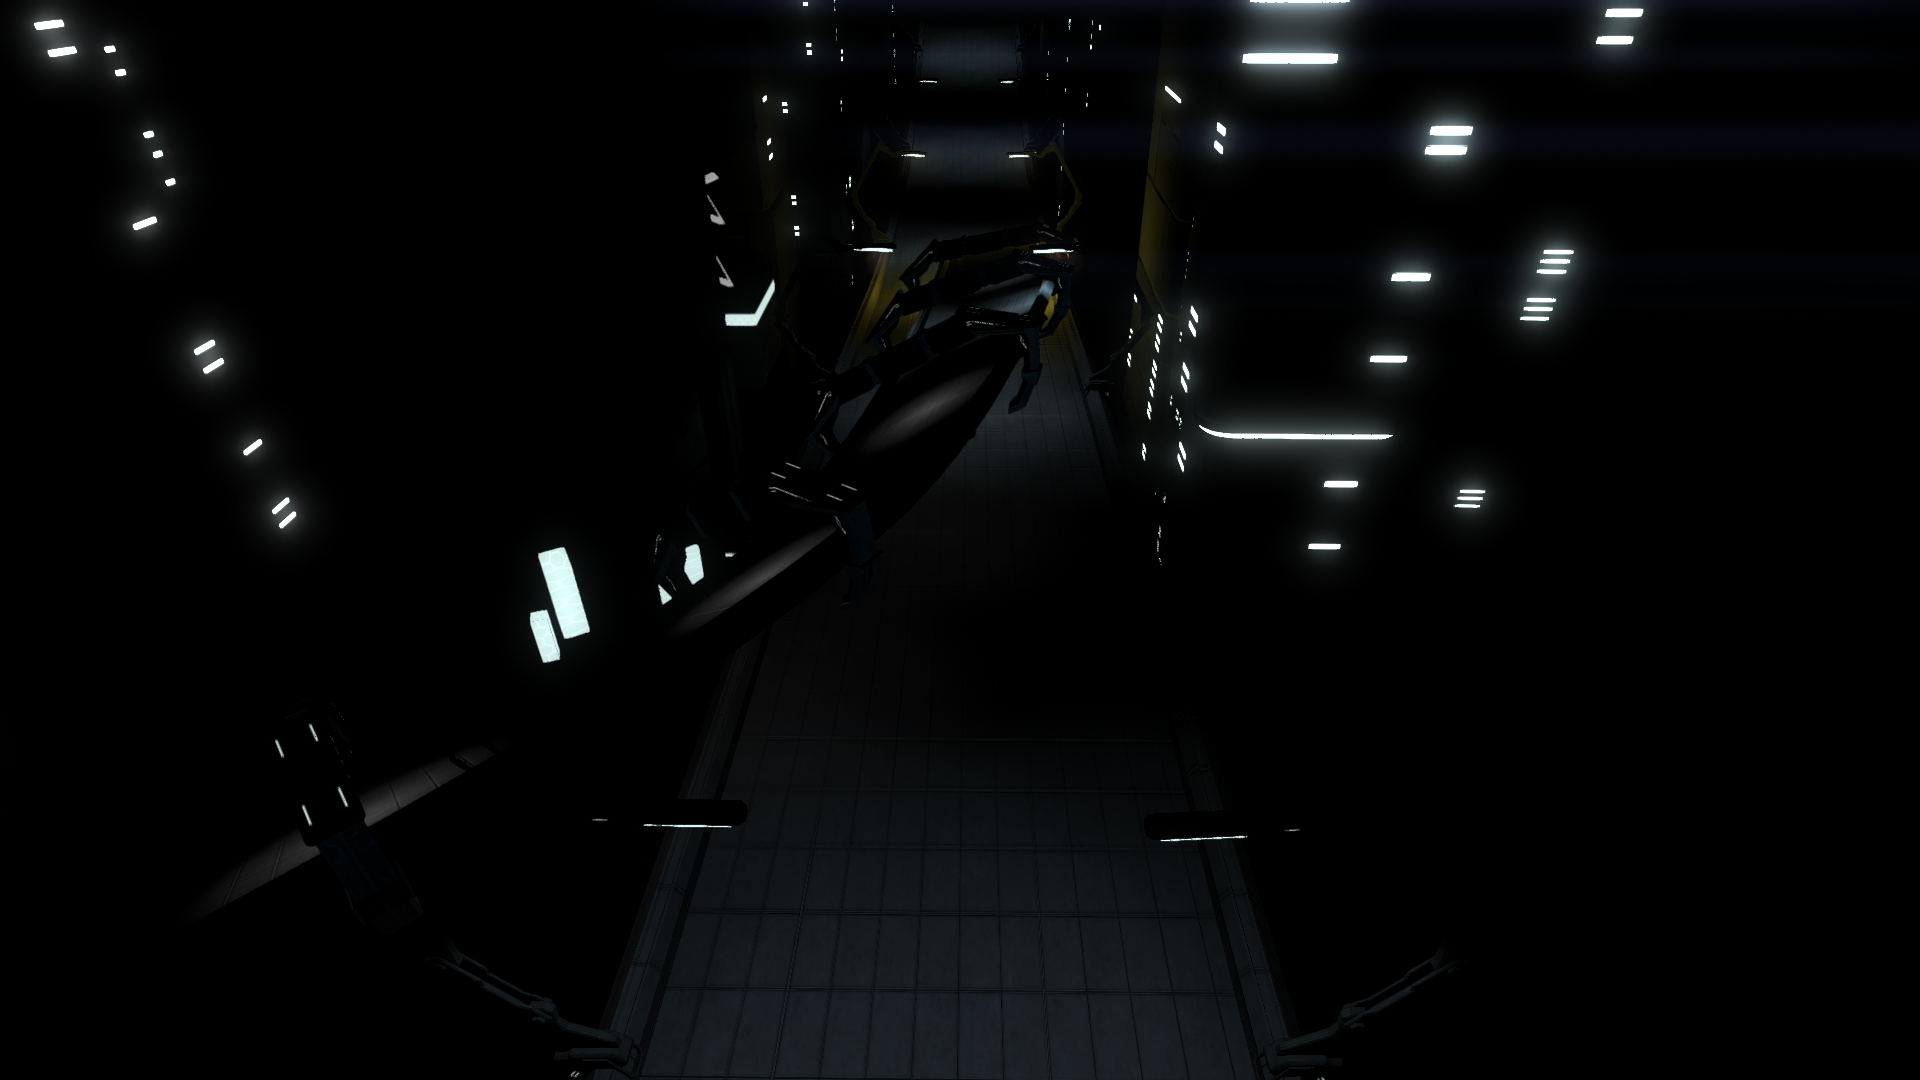
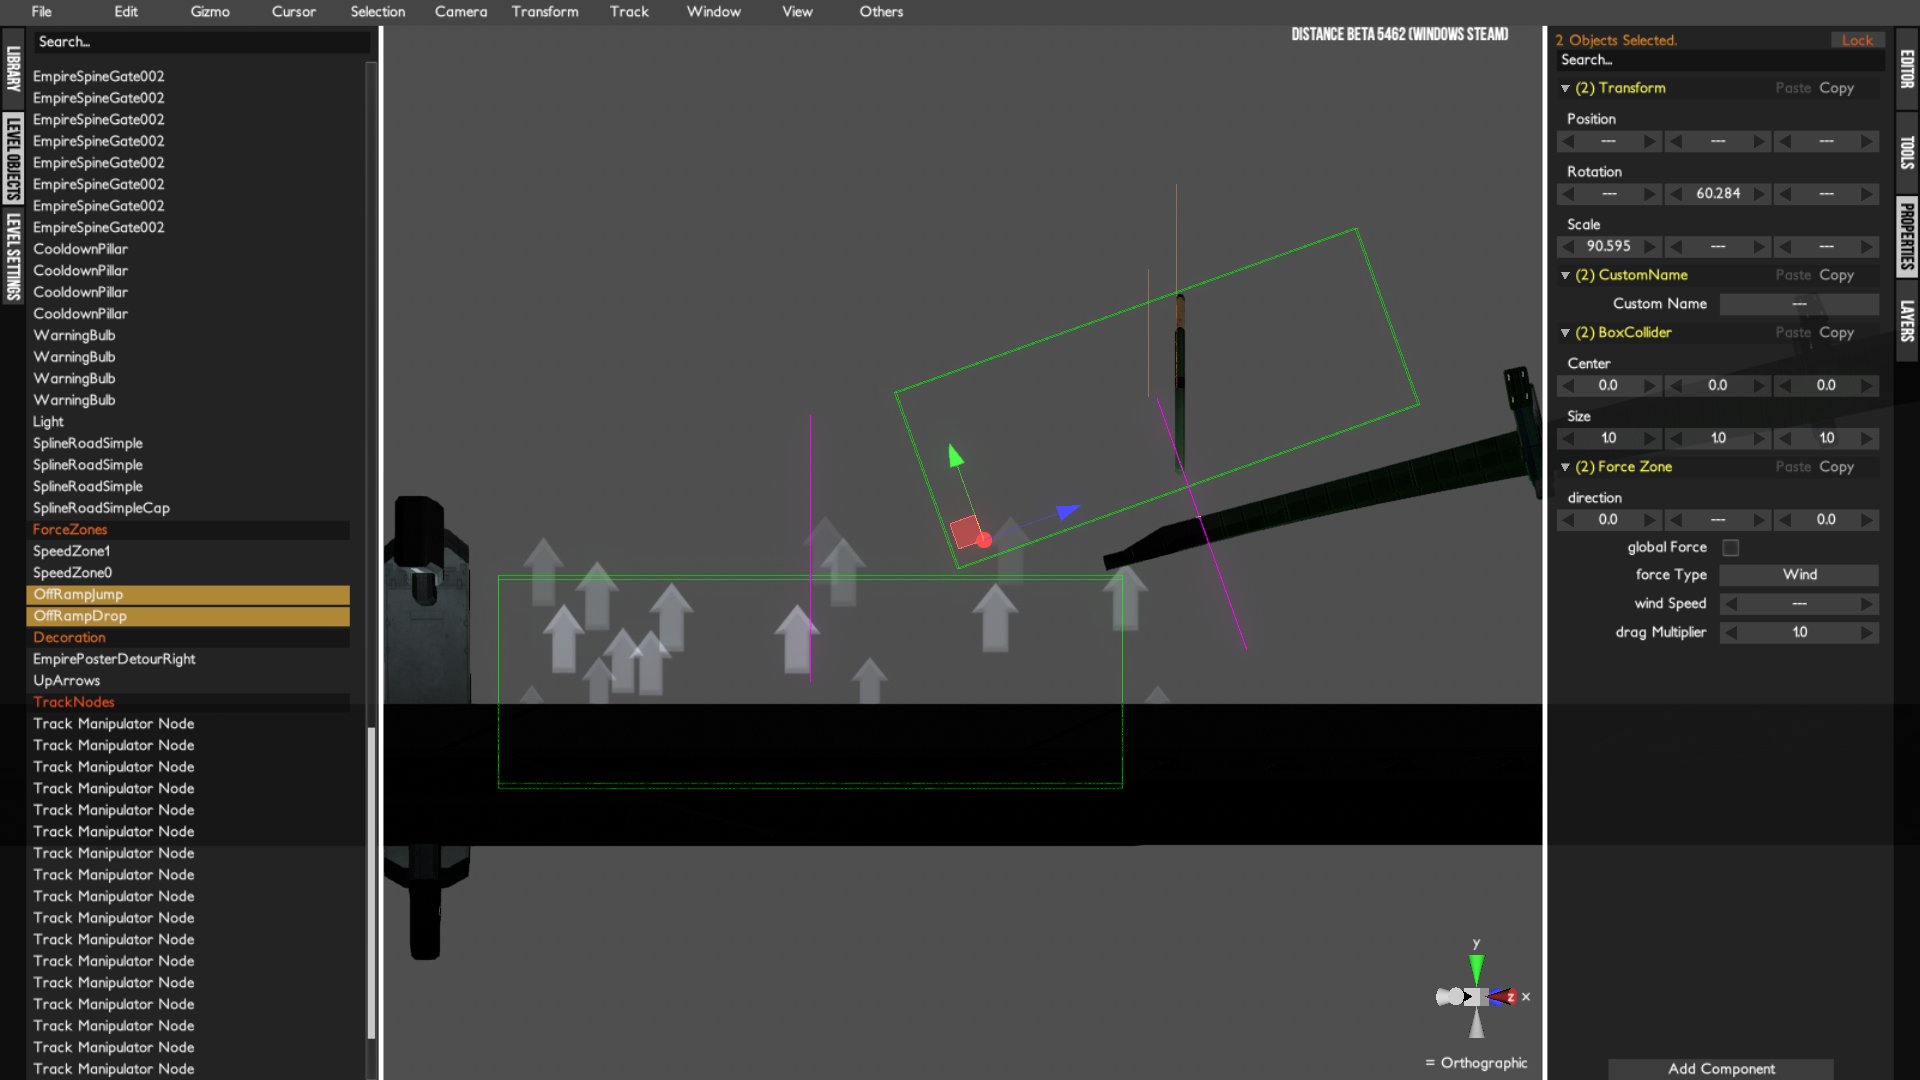
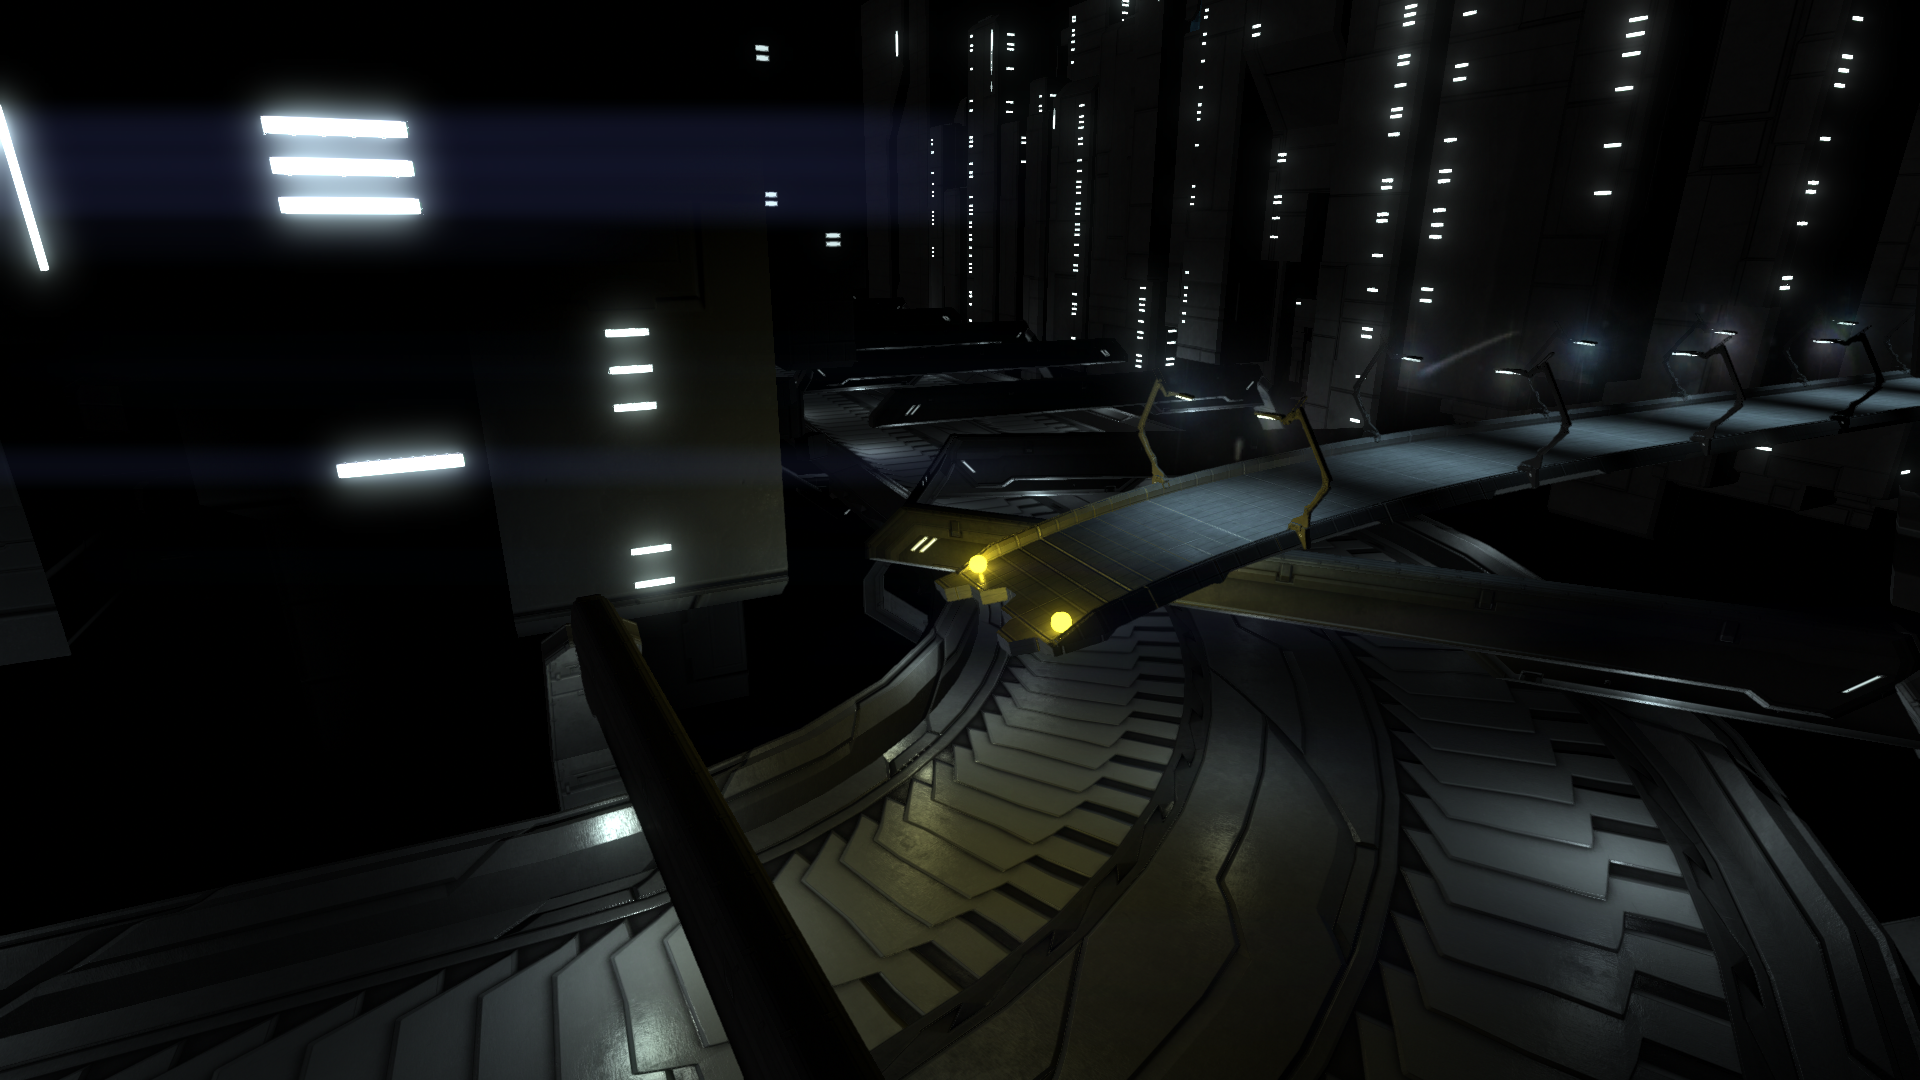
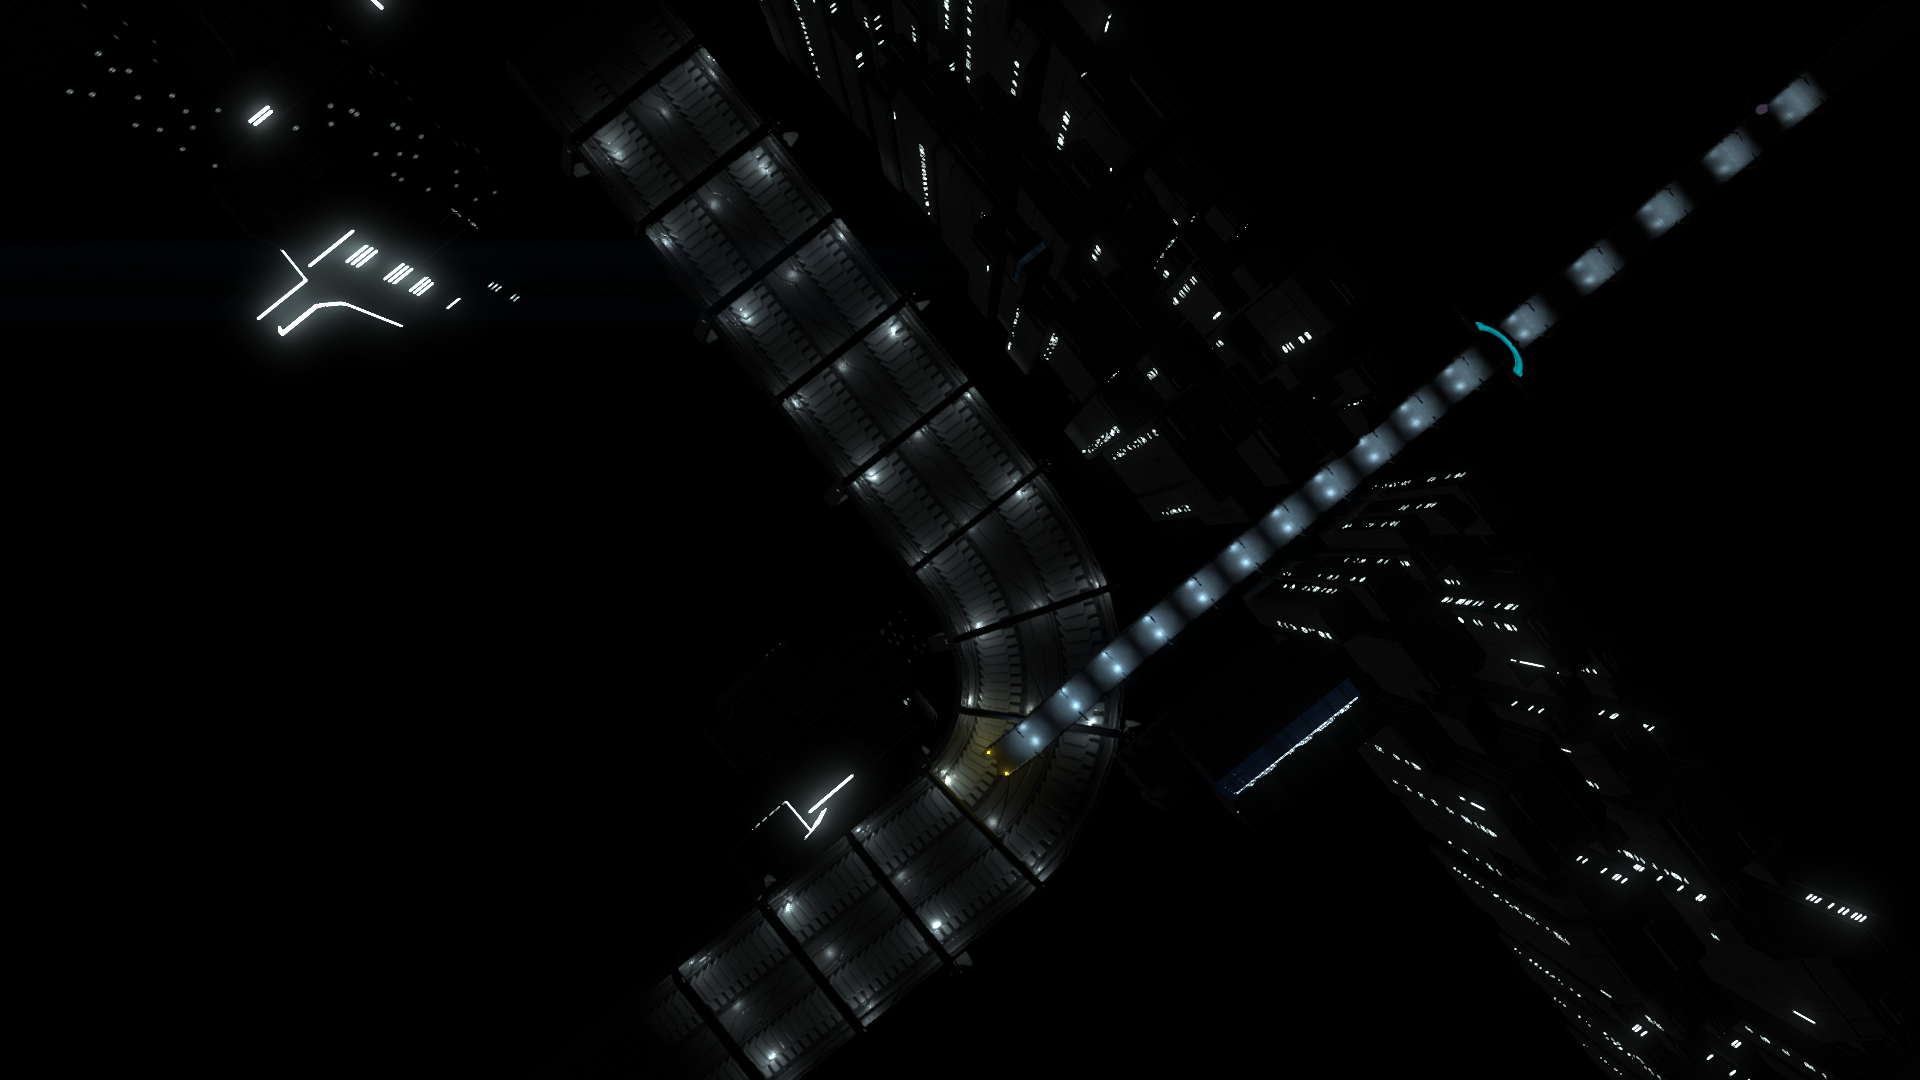
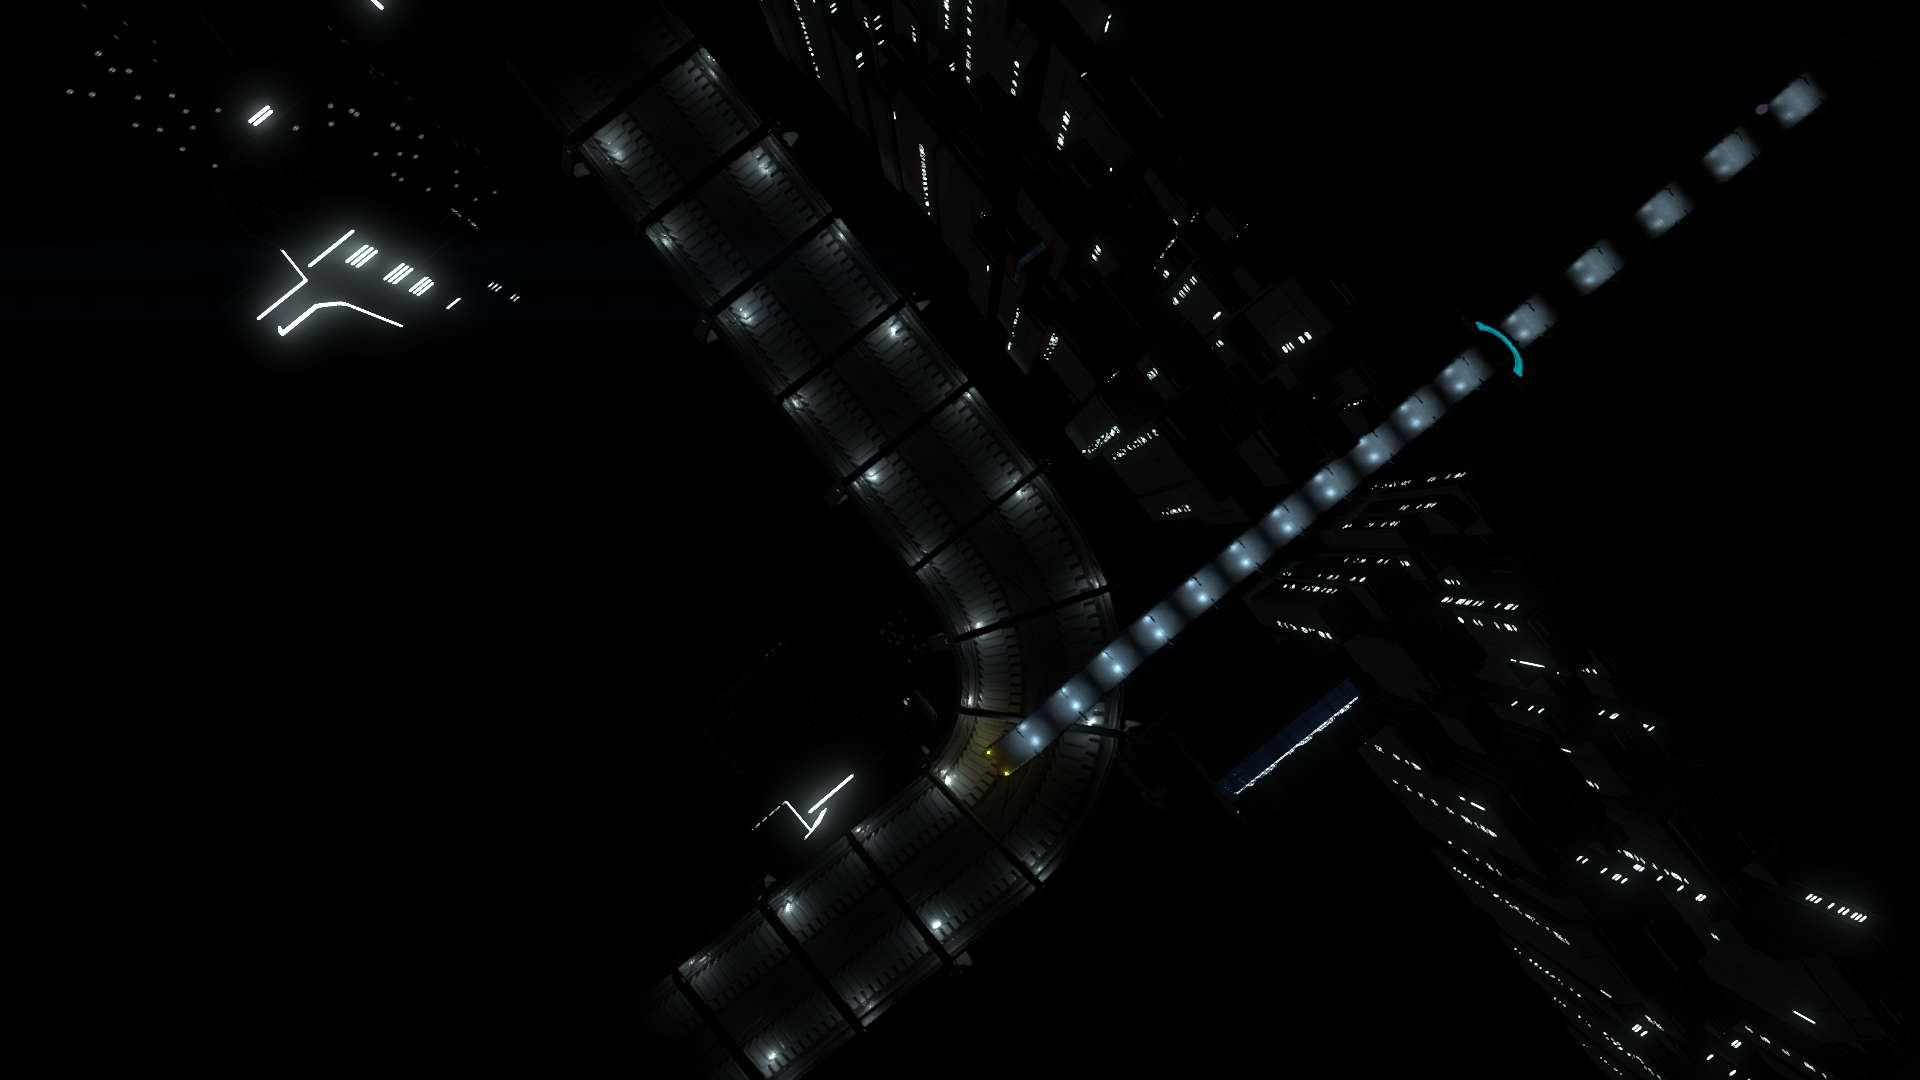
After a bit of pondering, I decided to make the "assisted jump" to the off-ramp extend all the way to the ground, meaning you don't even need to notice the track to go the right way—and I'm pretty sure you'll notice the arrows! After testing it a bit, I found that there were too many cases where you could miss the jump in some way, and it didn't make much sense to have something so simple be easy to miss. Unfortunately, heading into the jump at full speed tended to hurl you into the arch light I'd already set up. Rather than reuse the lamps from before, I simply used a downward ForceZone to lock the car into place. I'll need to indicate it somehow, but you can see the schematic below.
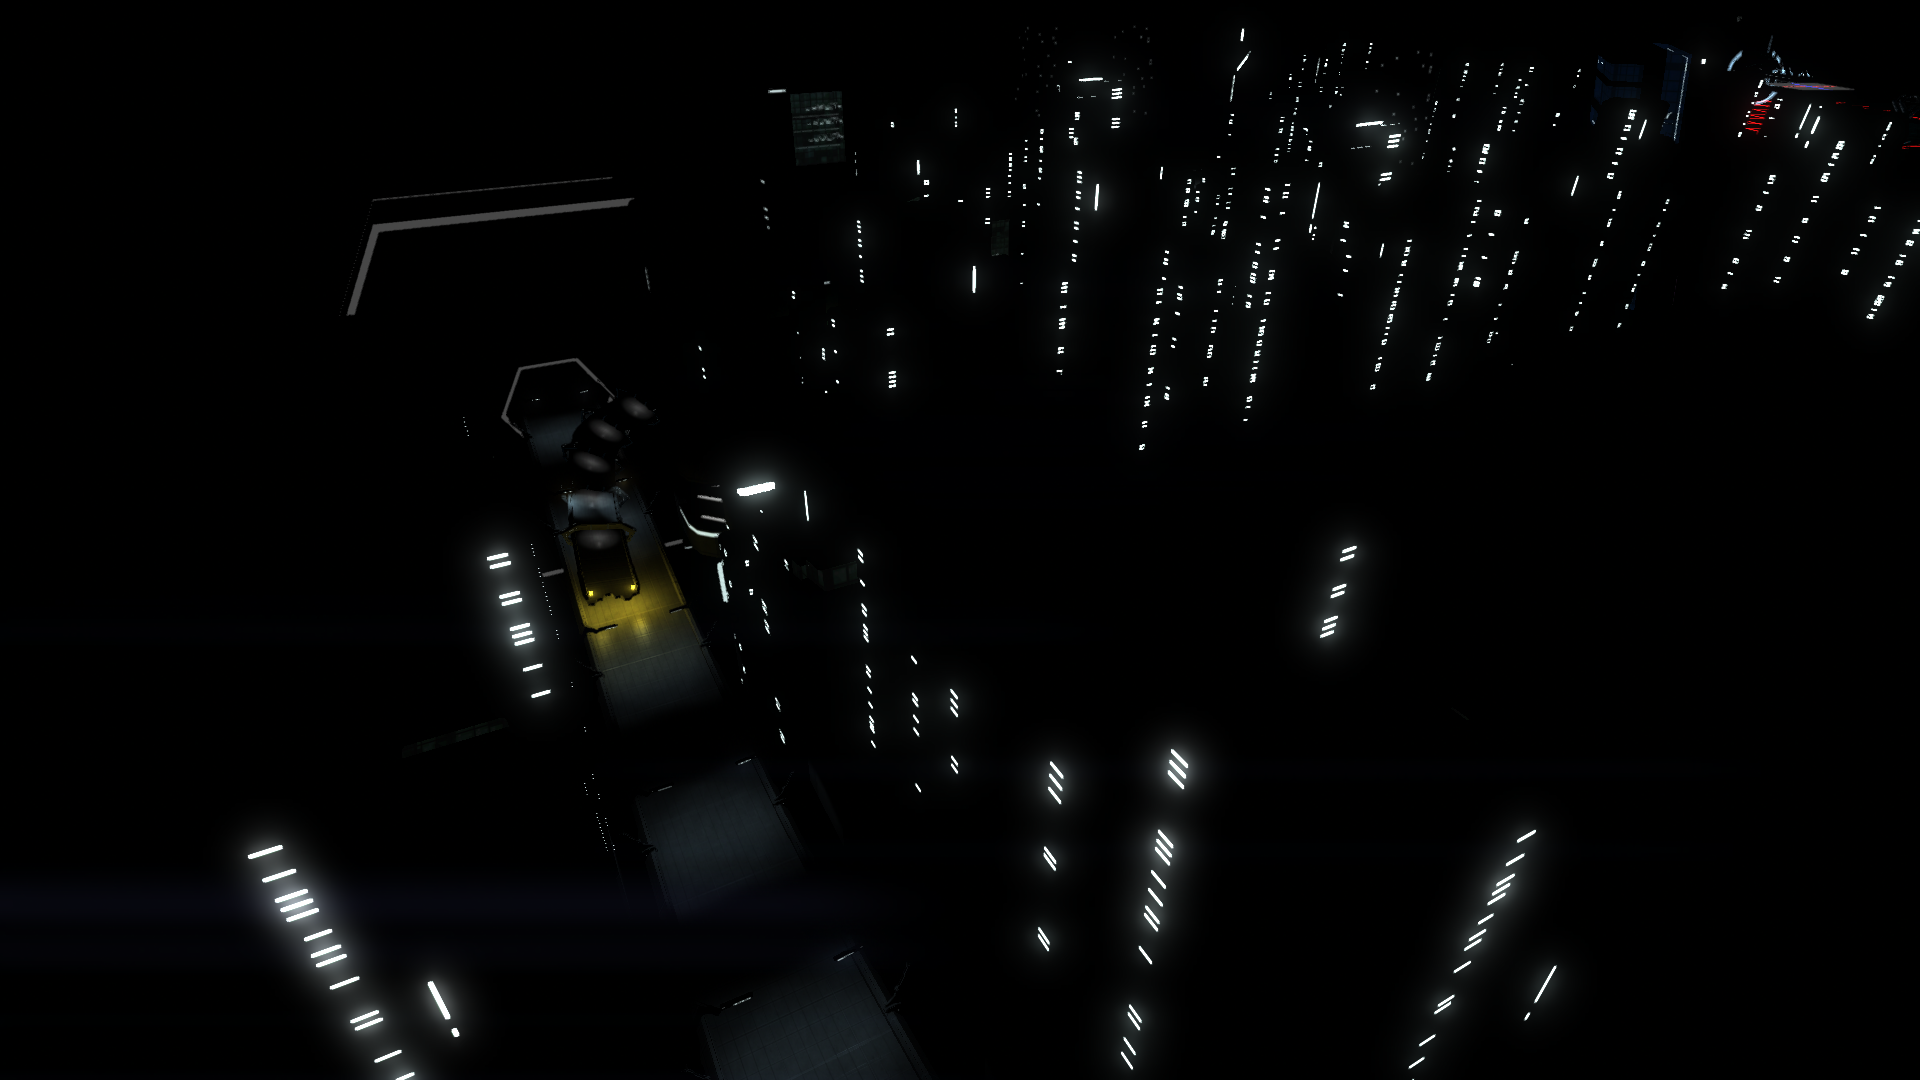
Other than that, I just finished up the off-ramp and added the other highway that you'll land on next. It's just a bit smaller than the one you just came off of. If you're familiar with US roads, it's more of a "US highway", whereas the first highway is an "Interstate" and the road you enter the city on is a "state highway".
Hope you enjoyed tonight's post! Despite the fact that I probably won't reach a full playable track by the end of this week, I'm still excited to finish this first sprint out. See you tomorrow~
Hey y'all! I took another day off last night—it was already late by the time I got free time and was in the mood for level editing, and I decided to catch up on sleep instead of trying to burn past my deadline again. While I didn't exactly make up for my missing submissions today, I still played with some new things and learned a bit!
Tonight was the first time I actually tried to set up a particle system in the Distance editor, so I basically took a crash course through the numerous options to get what I wanted. This guide to particle properties by Galen (snowstate) was quite helpful, once I remembered it existed. It especially helped me untangle the "quantize" and "repeater" settings. Fortunately, it only took 10 minutes or so of tweaking to reach the desired effect!
I created a field of lightly-colored arrows moving upward (derived from the ThisWay preset). I needed it to indicate the zone in which the car would be forced upward towards the off-ramp. If you read my notebook, you know that the on- and off-ramps on this "highway" are suspended above it, meaning you have to jump to reach the off-ramp. To make this easier (and make more sense in-universe?), I just set a ForceZone to push the car upward, that you have to jump into to activate.
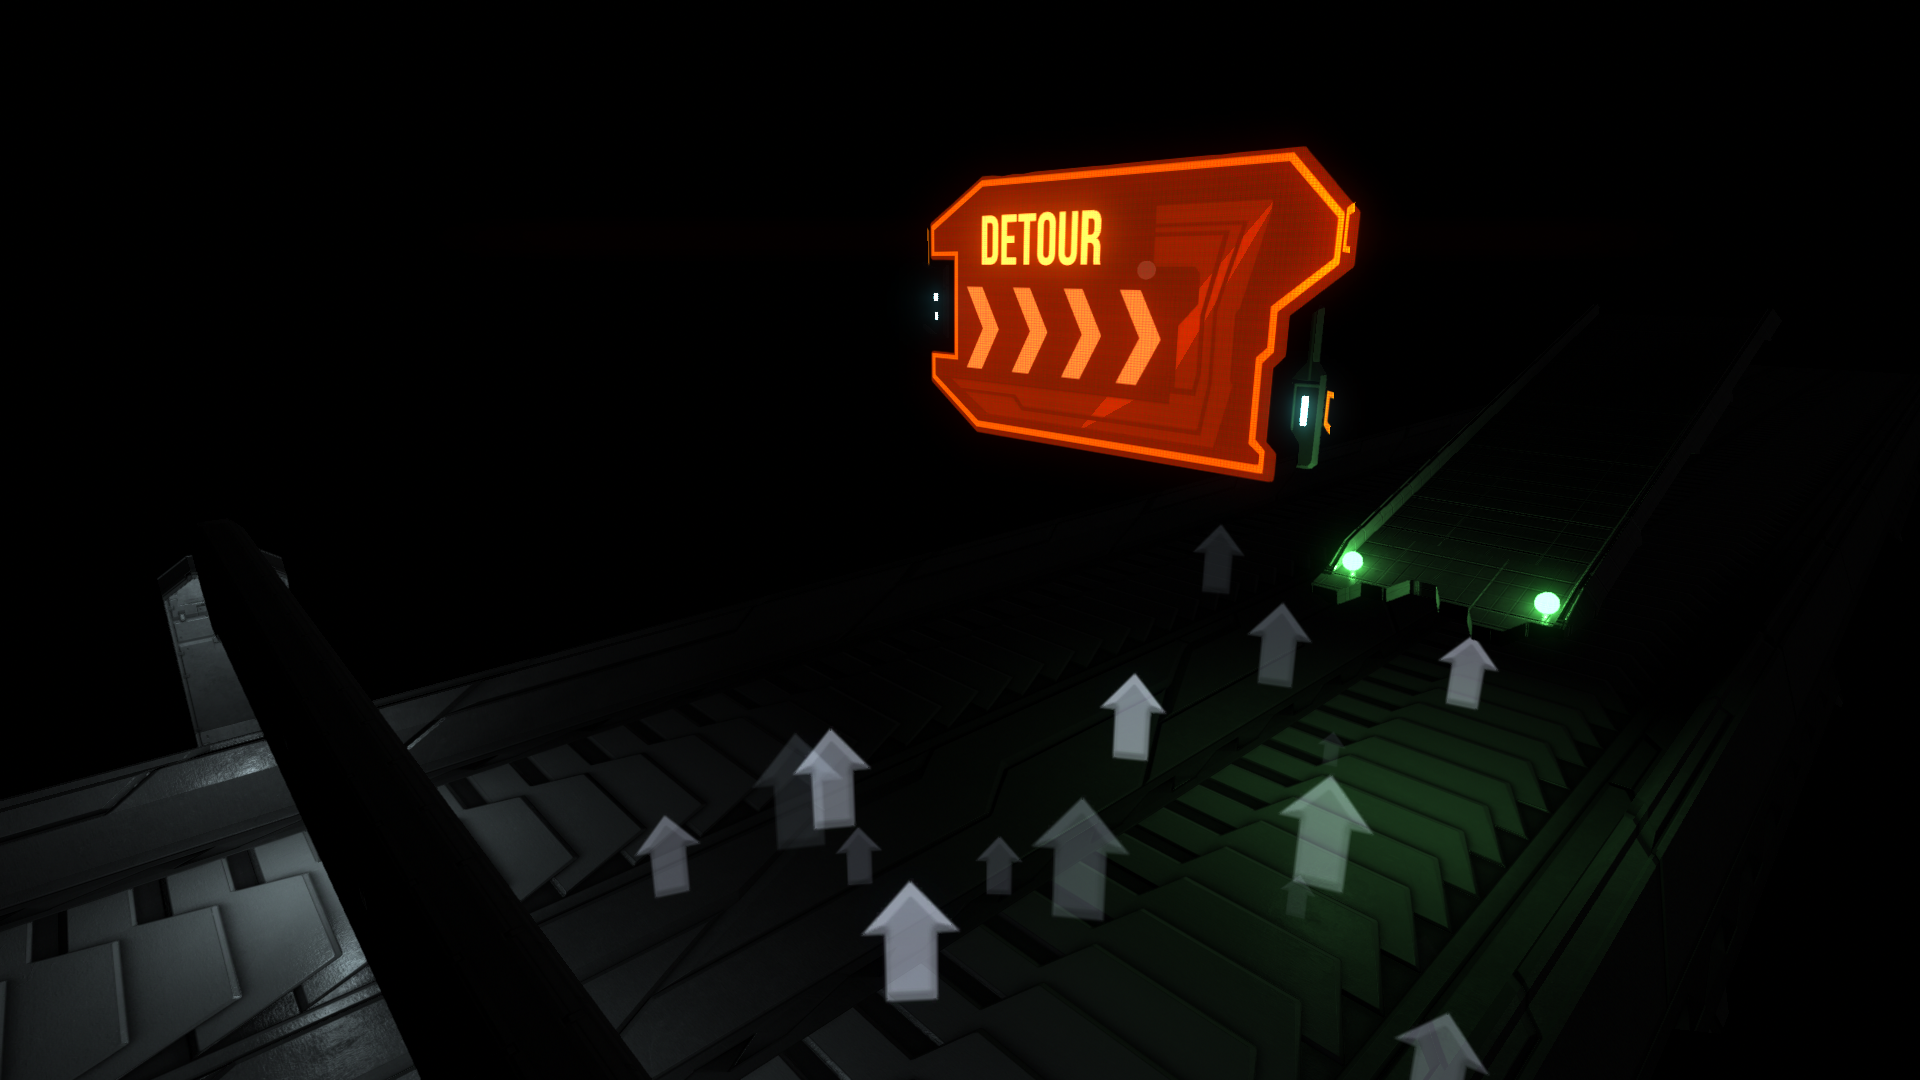
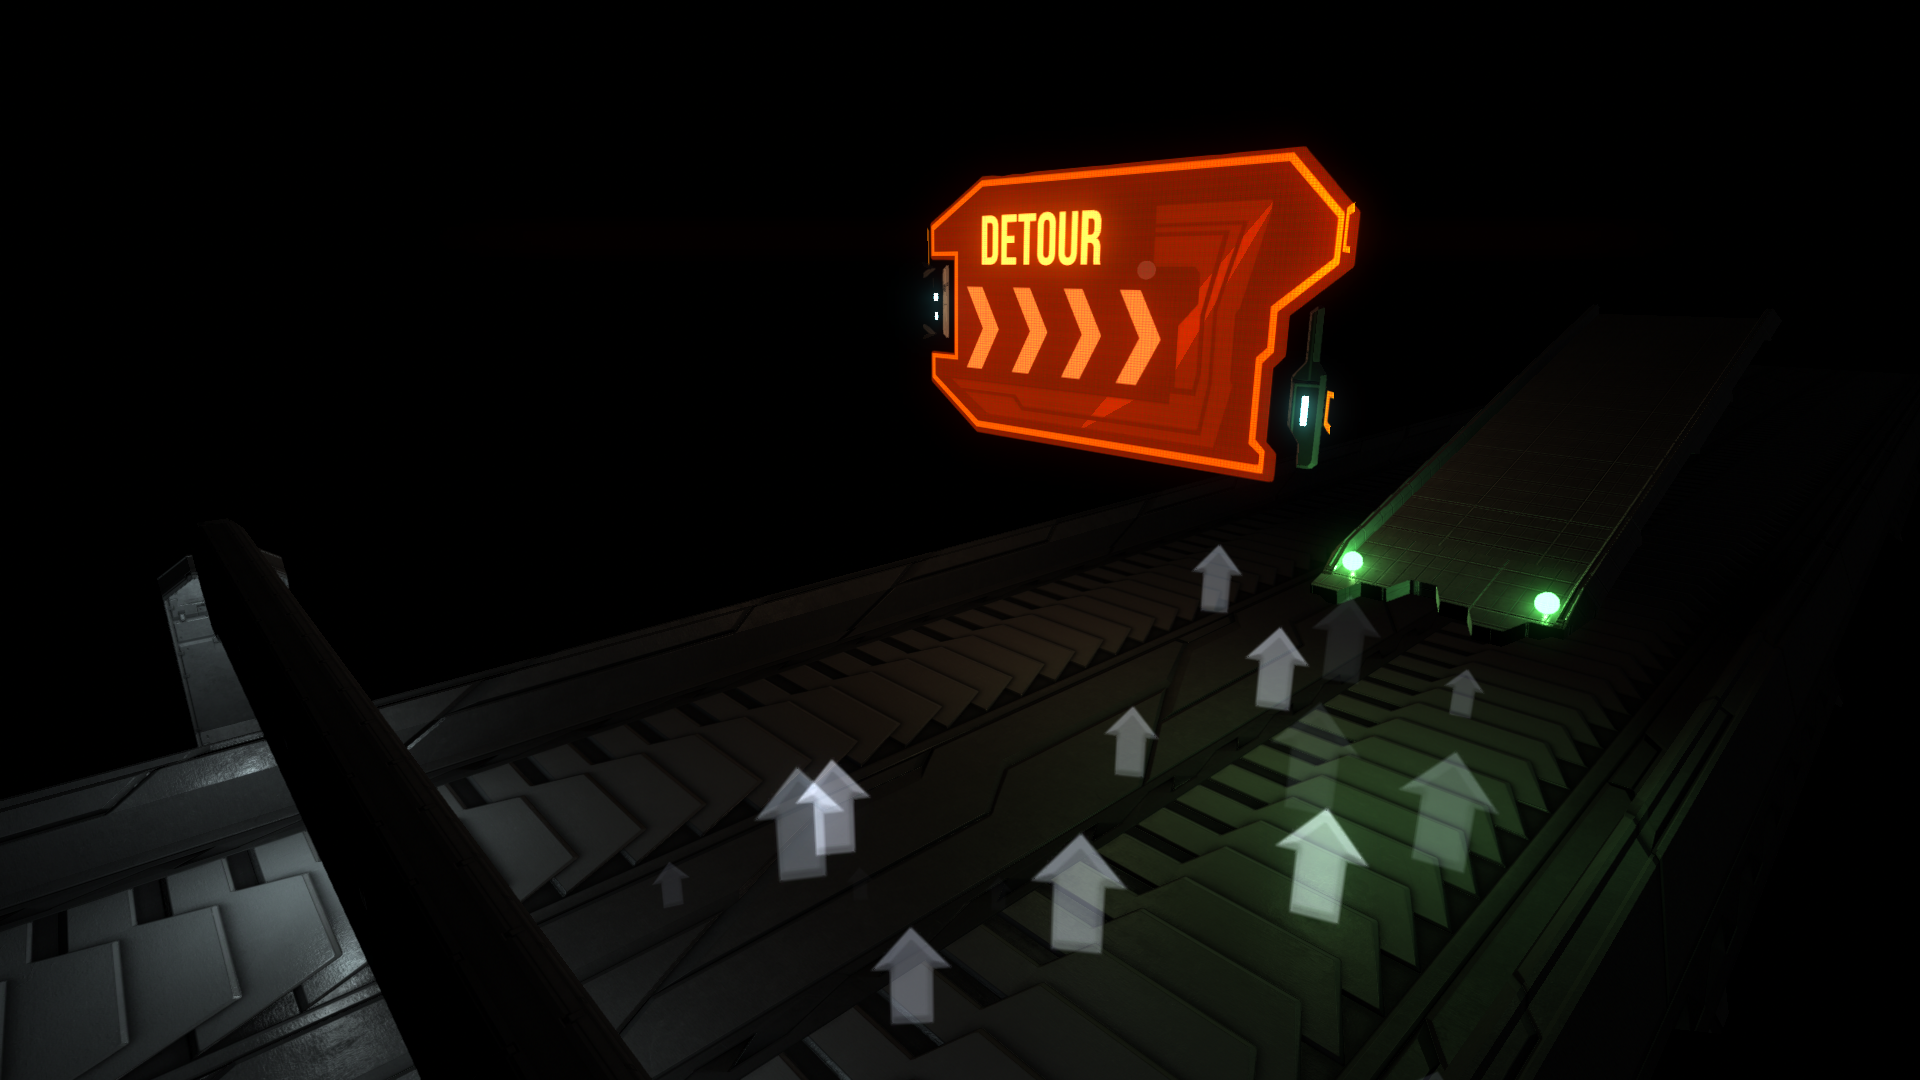
The other neat thing I got to do was use a point light on an object that wasn't explicitly a light. In this case, I placed a big detour sign to indicate the off-ramp is the only route to take (the sign even points towards it!). If you place an emissive sign in pitch darkness, however, it looks pretty odd. Adding a simple light to the center of the poster really sets the scene properly, complementing the poster itself and making the surrounding area more visible at the same time. You can see the difference below; it's really impressive how far one light goes!
Unfortunately, I fear this off-ramp is hard to identify on approach, obscured by the highway arches among other things. But I'll have to confirm that in testing, as I really should keep moving through the rest of the track at this point. Lay down, light up, move on.
I'm submitting on time this time! This only took like, what, 15 minutes to write? Sweet. I'm proud of myself, and excited to keep this going!! See you next time~
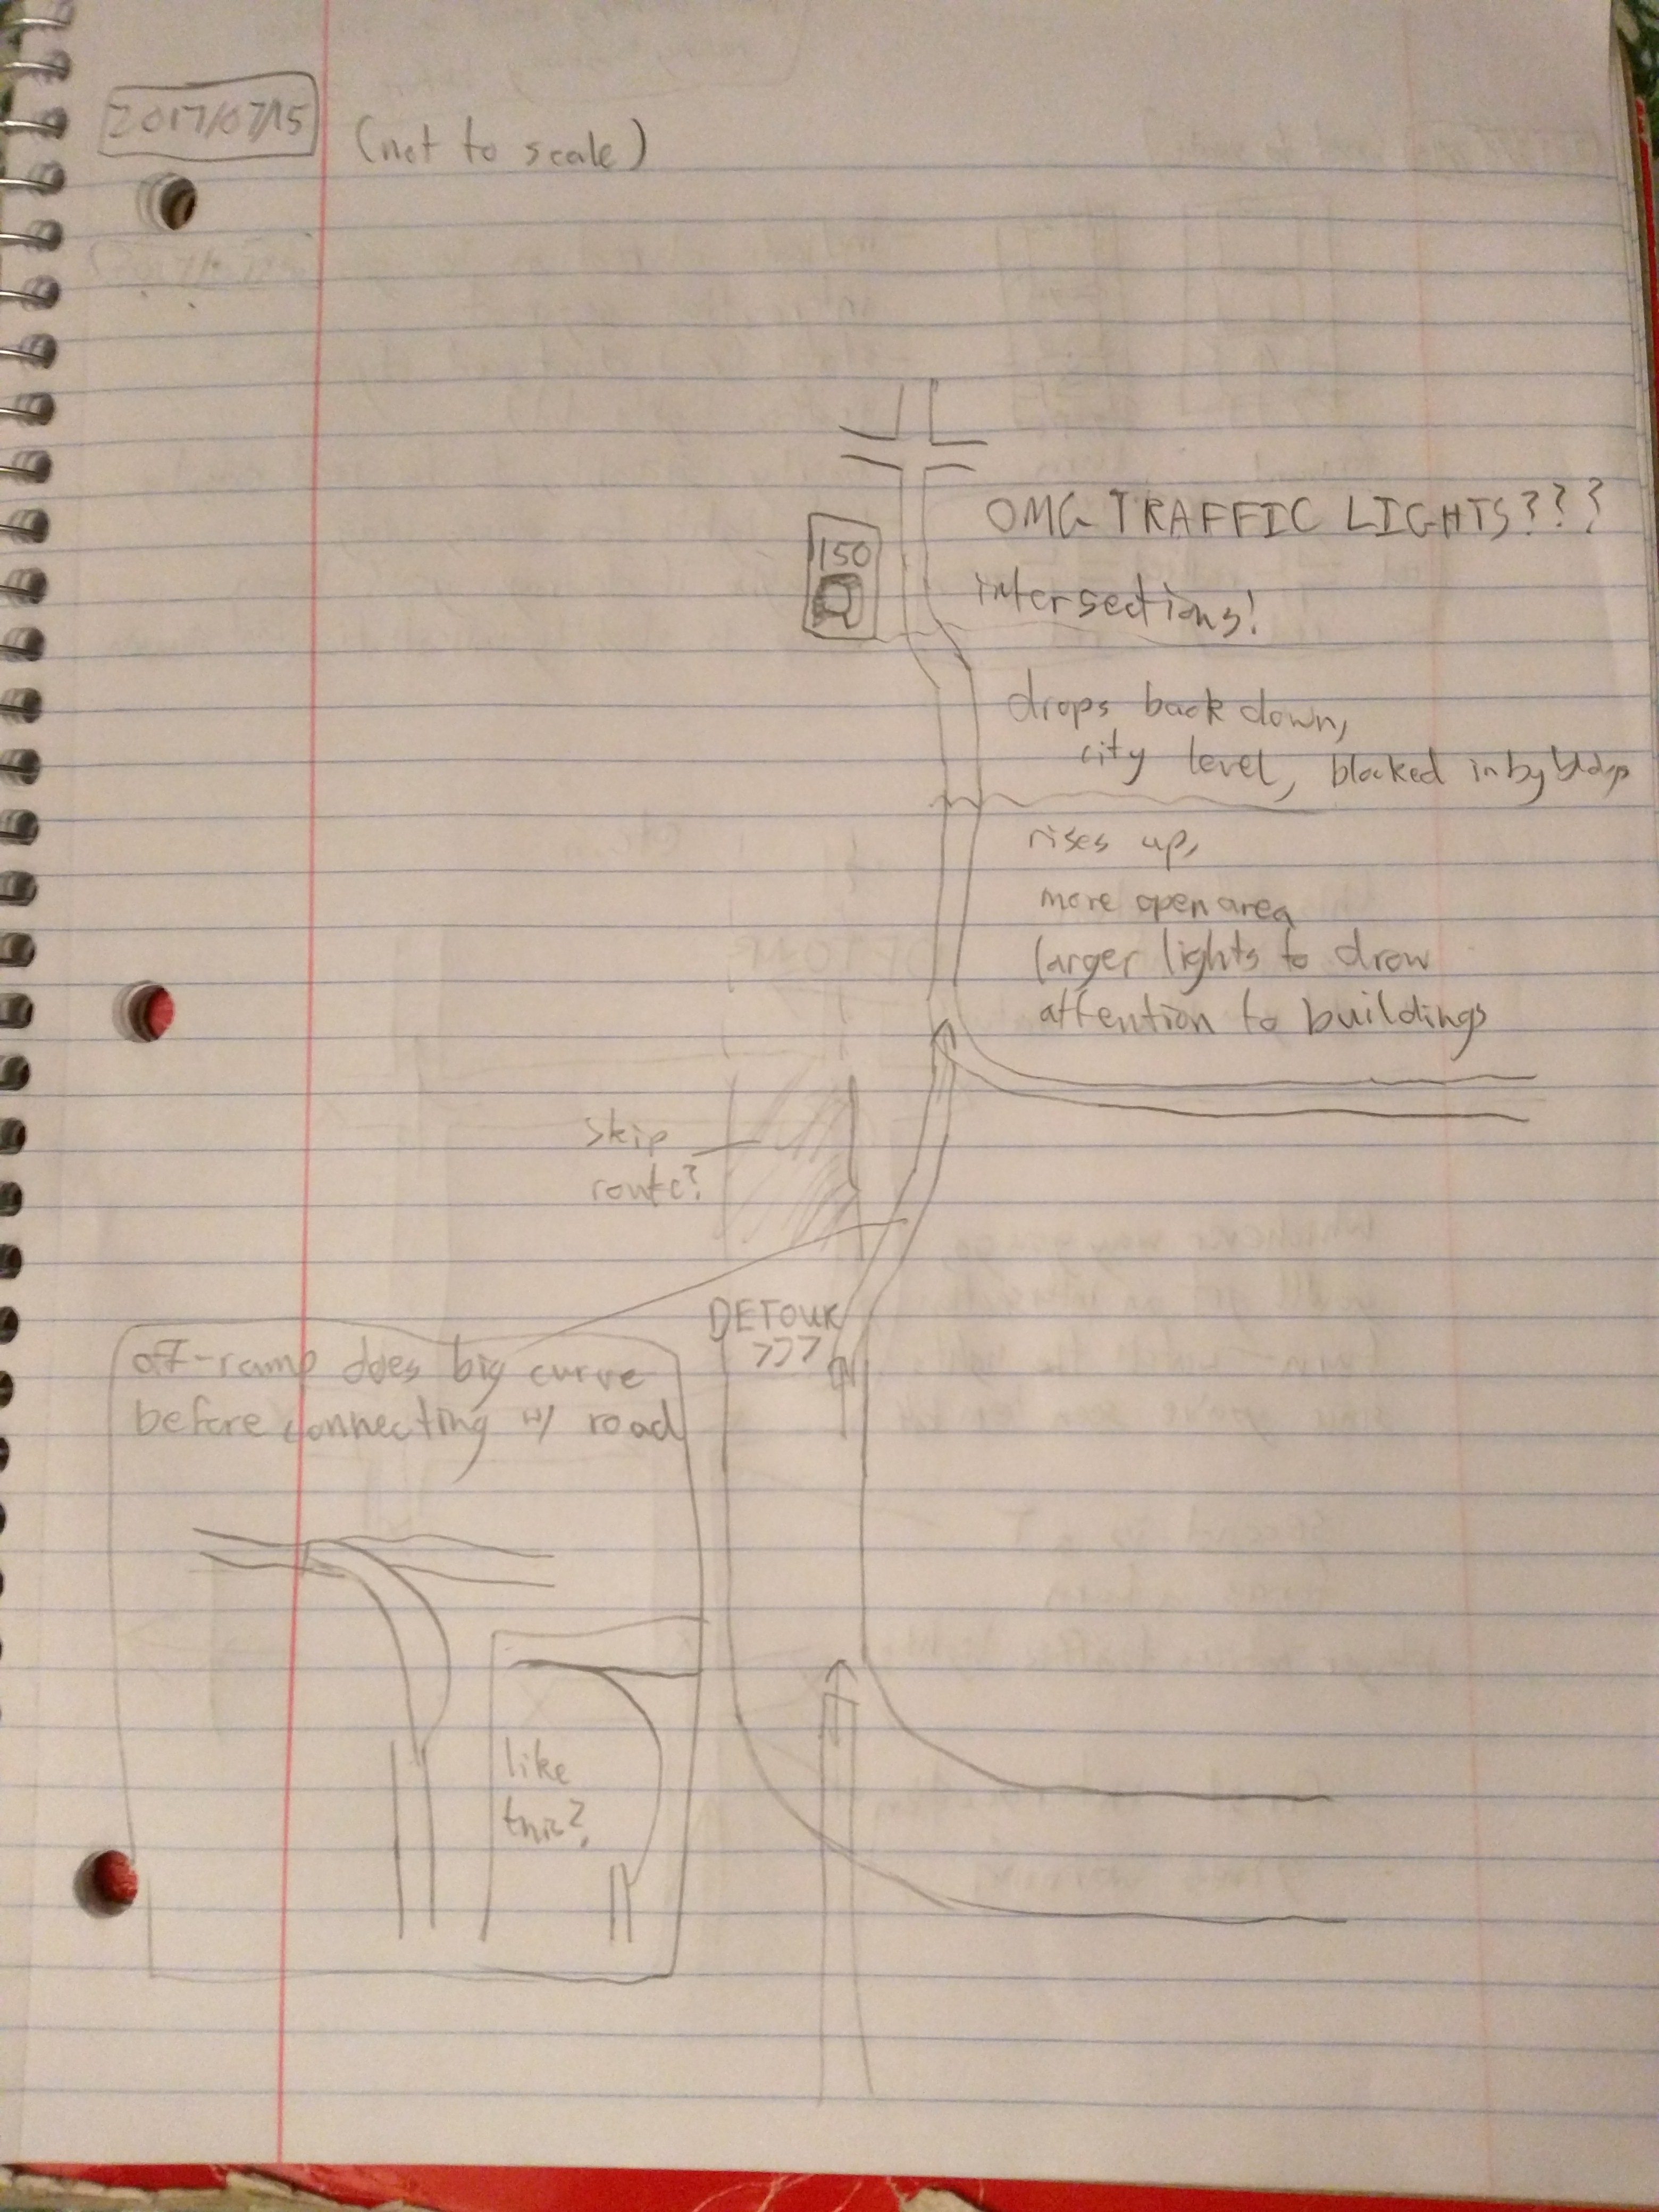
Hey all! Sorry I dropped the ball last night, I managed to get sucked into something that lasted a full hour past my deadline, and by that point I just wanted to sleep. I did do some sketching, though! You can see that below, as well as tonight's notes.
My game plan for the next couple of days is to go full-on into track design. I'll scatter some lights and buildings, but I'm leaving the heavy detailing until later, so I don't get hung up on them. I think at this point I'm just going to do a rough sketch of the level layout all the way to the end, before starting a track-creation sprint in the editor. (I'll probably leave some more detailed layout sketches of certain sections for until I get to them in the editor.) I've been a little haphazard with my design so far, though...maybe I should check back on my outline pages to reflect on the track's purpose.
I'm really excited to implement the traffic lights I've drafted here! On tonight's page, you can see how I'm aiming to establish their meaning to the player, so that they understand them prior to actually making decisions based on them.
That's about all I have to say for now, I think. Until next time!
Another day without much to report, even less than last night thanks to lethargy and a couple unexpected events. Nevertheless, I am going to talk about lights!
Last night, after some feedback, I adjusted the properties of the existing lamps. Previously, they had a small range and a very high intensity (15!). I turned the intensity down to 2 and doubled the range, resulting in a much softer light covering the same area with no decrease in visibility. (And now you can see the track texture again!) Increasing the spotlight angle to cover more area, however, came with significant impact to the level's performance. Personally, I like the effect of alternating light and dark strips while approaching the city, but if it's not well-received I may have to find a way around it, although I'm unsure if I can.
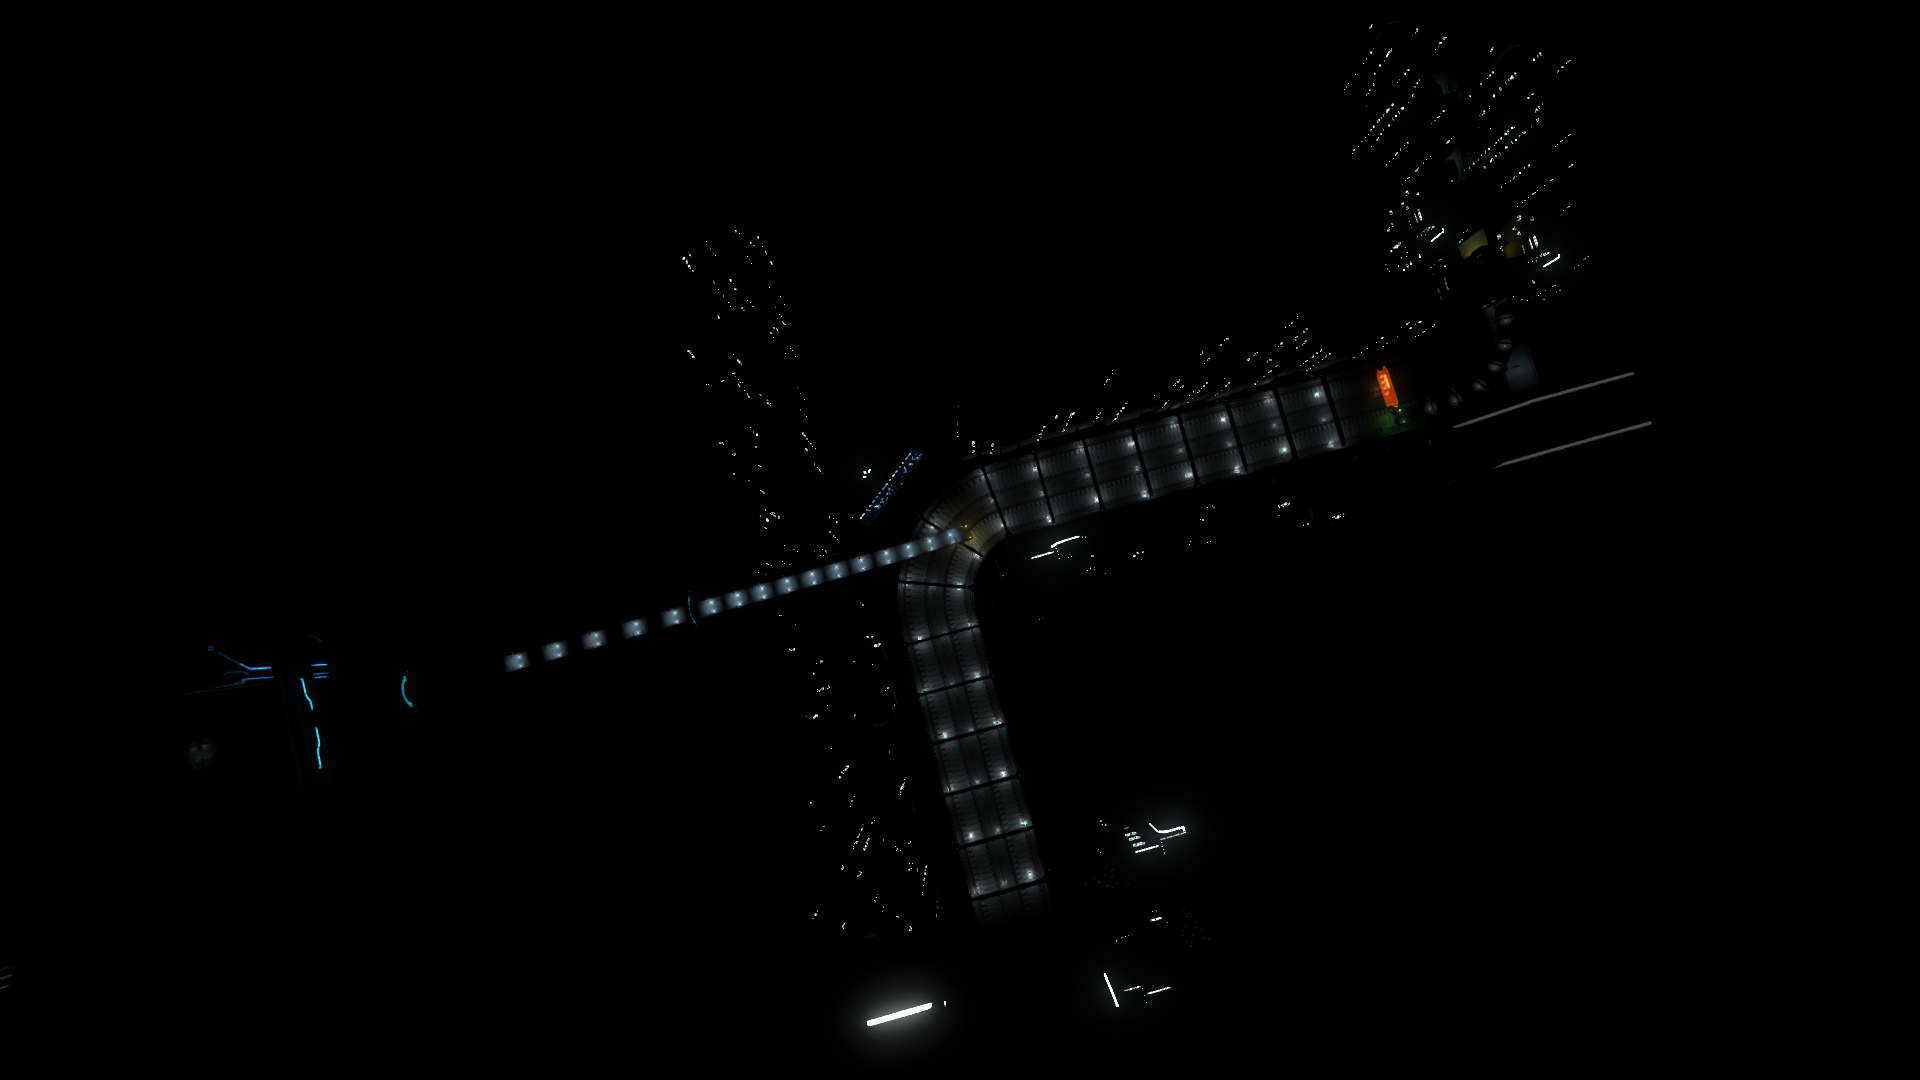
Tonight, I added arch lamps to the highway. The arch seemed like a nice way to evenly cover a large area with light, though I still needed to tune the lights themselves. The arch comes with three point lights, so increasing the range too much resulted in them bleeding out to the sides, and reduced performance. I settled on increasing the intensity just a bit, and also marked the center light on each arch as "detailed" (the player will only be on the right side of this highway). I suspect as I continue adding to the track and add more decorative lights, I will need to keep a close eye on framerates, and I will definitely have to do a major light cull before this level is published.
Speaking of adding more to the track, I find that the less time I spend on it, the more I become obsessed with details, since they are the easiest to mess with in small time frames. The path forward for me is to aggressively pursue the level layout before attempting to detail anything, even to the point of leaving things nearly broken for the sake of having a completed track. For instance, at the current speed, the on-ramp track dumps the player just shy of an arch, which they will crash into if they don't dodge it quickly. This is an obvious issue, but if I don't push past small adjustments like those, I'll be stuck in development hell, tweaking tracks and fiddling with lights all night (or 30 minutes out of the night). Just like any good drawing, I need to know what the overall thing looks like before small adjustments actually become useful.
I'm going to wrap it up here for tonight. I hope hope hope I work on this level during the day tomorrow, but clearly I need to take some larger steps before that happens. (Plus, the Splatoon 2 Splatfest will take up the evening...) See you tomorrow~
Tonight was all about implementing my track sketch. Unfortunately, I got caught up in the details again—I spent a good deal of time fiddling with the looks of the new buildings I was adding, as well as the highway itself. However, I pushed myself toward just getting the track down, since that was the important part. The buildings and highway can be decorated properly later.
I realized as I was testing that there's no reason to slow down the car for this stretch—you're getting on a larger track, and everything is straight, so why bother? I may end up cutting the two "standard" speed zones, in favor of making the one in the heart of the city be standard speed. Or perhaps they will still play some limited role. Naturally, more testing, and testing from a wider audience, will be helpful.
Speaking of more testing, I want to keep a loose target of having a testable track by the end of these two weeks. That means I'll need to lay down track with purpose, and spend less time feeling aimless. Even if I sometimes feel like my track design is arbitrary, I just need to get something down. I can think about the whys of track placement later, once I've got some test results to think about. That's how you start from scratch, you know? You try something, test it, figure out why your design produced those results, and take that into account in future iterations and projects.
The highway still lacks lighting, since I was thinking about the layout first. However, I did add "warning bulbs" to mark the end of the track as it falls onto the highway. These will likely need tweaking to improve visibility, especially since the track end is a fairly sudden downward slope.
Today, I spent roughly 3 Pomodoros (25-minute blocks) on this track. Tomorrow, if I don't fall asleep in the middle of the day again, I want to spend more, at least 4, possibly more. Tonight's log is a bit terse since I only really gave myself 20 minutes or so to write it; I want to at least try to hit my own deadline, even if I miss it slightly. Ideally, I'll give myself the last hour or two to write, if I follow through on my goal to work earlier in the day.
I hope to bring more insights on track and lighting design in the coming posts. Stay tuned!
Once again, I dropped the ball and didn't get to level design until very late today. That's just my own mangling of my daily schedule, though. That is to say, I just go with the flow and leave necessary tasks until the later hours, when I can still get distracted anyway.
Unlike last night, though, I took the time to sketch out a detailed plan of what I'm going to implement next. No editor work tonight; I'm late enough with this post as it is, and it's more important that I know what I'm doing before I do it. The wait time prior to implementation gives me an extra chance to mull over my choices, too.
Hopefully my sketching skills will improve as I do this more, but I'm pretty proud of what I have so far. Tomorrow you'll get to see how well I interpret this in the editor (I expect interesting building placement to be a challenge).
Along with jumping into design earlier in the day, I want to more consistently use the Pomodoro technique to block out my time, and maybe even start recording how much time I put into this (yay stats!). I've been using the technique loosely, only really obeying the timer part, but even in that form I still find it useful.
Sorry if you were expecting more about the level than the process, but I hope tonight's pages speak for themselves. If you have any questions, feel free to leave a comment below, or contact me however you know me!
Had more things to do today and got distracted again, but I managed to get a little bit of planning in. Only going to have a few simple speed zones, as I mentioned; the speed is linked to how difficult the track is.
(First page is older, second page is from tonight. I'm putting dates on them now, which is useful!)
daily from


Post a comment